
Many folks have made the Sew Together Bag. I’ve made one and yesterday I made another using Alison Glass fabric, handcrafted indigo. I was inspired by Quilting JetGirl’s Alison Glass Challenge to use Alison’s fabric in a project.
Even though I had made this bag before, it took me a little while to understand how to make the side pieces.
The “pattern piece” at the end of the pattern is easier to understand as a template and should be cut like this:


You’ll cut 4 in total with 2 interfacing pieces.
Then you add the inside with zippers and pockets. That part is fairly easy to understand from the pattern. The final stitching to make the pockets is more difficult.
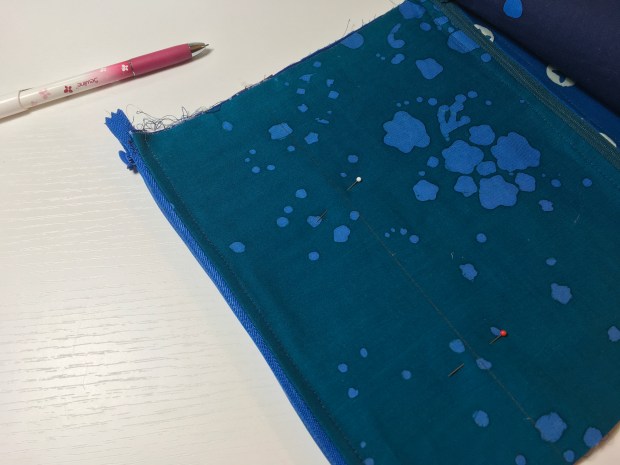
Once you draw the line for the stitching, the inside looks like this:

Once you get those first template pieces sewn together, you attach them to each side of the inside. Then you stitch the side panels to inside.

TIP:
When attaching the template pieces to each pocket, make sure all the layers get stitched down flat with the zip zag stitch. It makes adding the binding so much easier.
Another place where you might have trouble is attaching the 18″ zipper to the top, which holds the whole thing together. Here’s how it works:
Zipper up– the first layer.
Binding on top.
Fold over the binding and stitch down.


The other side is done the same way with the Zipper Up.

The rest is easy. Just go slowly when stitching down the zippers to the bottom side of the bag.

Discover more from Wanda's Life Sampler
Subscribe to get the latest posts sent to your email.

Great selection of fabric for your sew together bag, and I am sure many will appreciate you for sharing some tips along the way. Thanks for linking up!
LikeLike
Thanks, Yvonne for the inspiration.
LikeLike
Wow what a great project! Love how it turned out. I’ve been thinking I need to make a few small project bags, maybe I’ll add this to my to do list. Thanks for linking it up so I could see it!
LikeLike
Your bag is beautiful! I have made 2 of them, and think the pattern could be better written but the bags came out quite well! Nice that you published hints about how to do it 🙂
LikeLike