Quilting makes the quilt, they say. When I began exploring the Volume chapter of Carolyn Friedlander’s Savor Each Stitch, I thought I had been thinking about volume all along. I had made five quilts, one for each of the chapters: Line, Contrast, Scale, Color and Emphasis (this one isn’t quilted yet). I haven’t blogged about all of these — soon, I promise.
BUT, I learned I could use VOLUME to create a unique design.

Solitude!
Susan, a member of our Savor Each Stitch Bee, posted photos of ideas for playing with Volume. I began to think about trapunto. When I think of trapunto, I think of traditional quilts with feathers. Tim Latimer has a good tutorial on how to trapunto the traditional way. He has an amazing Snowflake using trapunto.
I wanted easy and modern trapunto. I searched YouTube and saw this video by Lynn Witzenburg.
How do you easy trapunto?
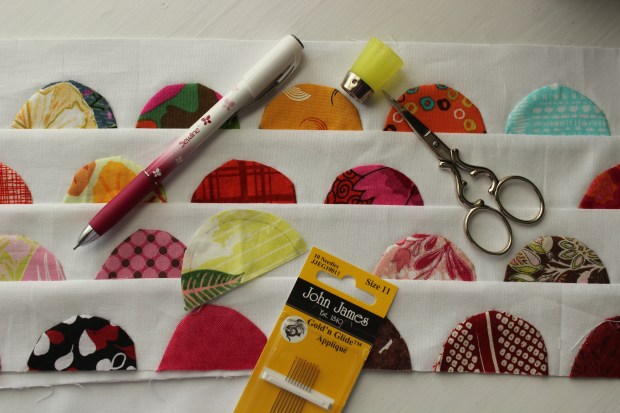
First, you need water soluble thread.

Superior’s Vanish Extra Water Soluble Thread
Second, you use the water soluble thread on top and a matching cotton thread in the bobbin.
Third, layer two pieces of batting under one piece of fabric and stitch where you want the trapunto using your sewing machine.
Fourth, cut away the batting along the edge of the stitching with applique scissors.
Fifth, add batting and backing as you normally would.
Sixth, quilt along the water soluble stitching.
Seventh, bind it and wash it.

The white sections are where the layers of batting have been cut away, leaving the two layers of batting; they stay put with the water soluble thread and cotton bobbin thread.
I applied these skills to my Solitude quilt top. The bottom section of the quilt is trapunto. I made each batting section progressively larger to give it an horizon. I filled in with matchstick stitching.
As Lynn explains in the video, it is easy to snip the top when cutting away the batting. I used applique scissors but they were too sharp on the end, and I cut my quilt top multiple times. If I do this again, I will try a different pair of applique scissors.

I did not trapunto the whole quilt. I experimented with matchstick quilting to get a similar effect. That is the quilting on the top left. I used my walking foot and stitched lines every half inch then filled in with the matchsticks, every other one.
After it was quilted, I realized my “black pencil” looked like an exclamation point, so I added the a trapunto “point” to it. It’s appliqued by hand to the finished quilt. I hand quilted the trapunto sections. It gives it more Volume, and I hope something different to the quilt.
This chapter made me whine the most. I thought I understood Volume and I didn’t need to make an entire quilt using this technique. I was wrong. In Solitude!, I found a design tool I will apply to future projects.
The next and last chapter is Texture. Carolyn’s project is called, “Crazy.” I do like the idea of being inspired by Crazy quilts and their decorative embroidery stitches.
Stay tuned,
Wanda


 That’s it. Easy.