Subject to Change: Fabri-Quilt New Block Blog Hop

INTRODUCING a 12″ x 12″ block designed for the 2015 Fabri-Quilt New Block Blog Hop. It’s called SUBJECT TO CHANGE because you can easily move the pieces or change the fabric selection to create a subtle difference in each block.

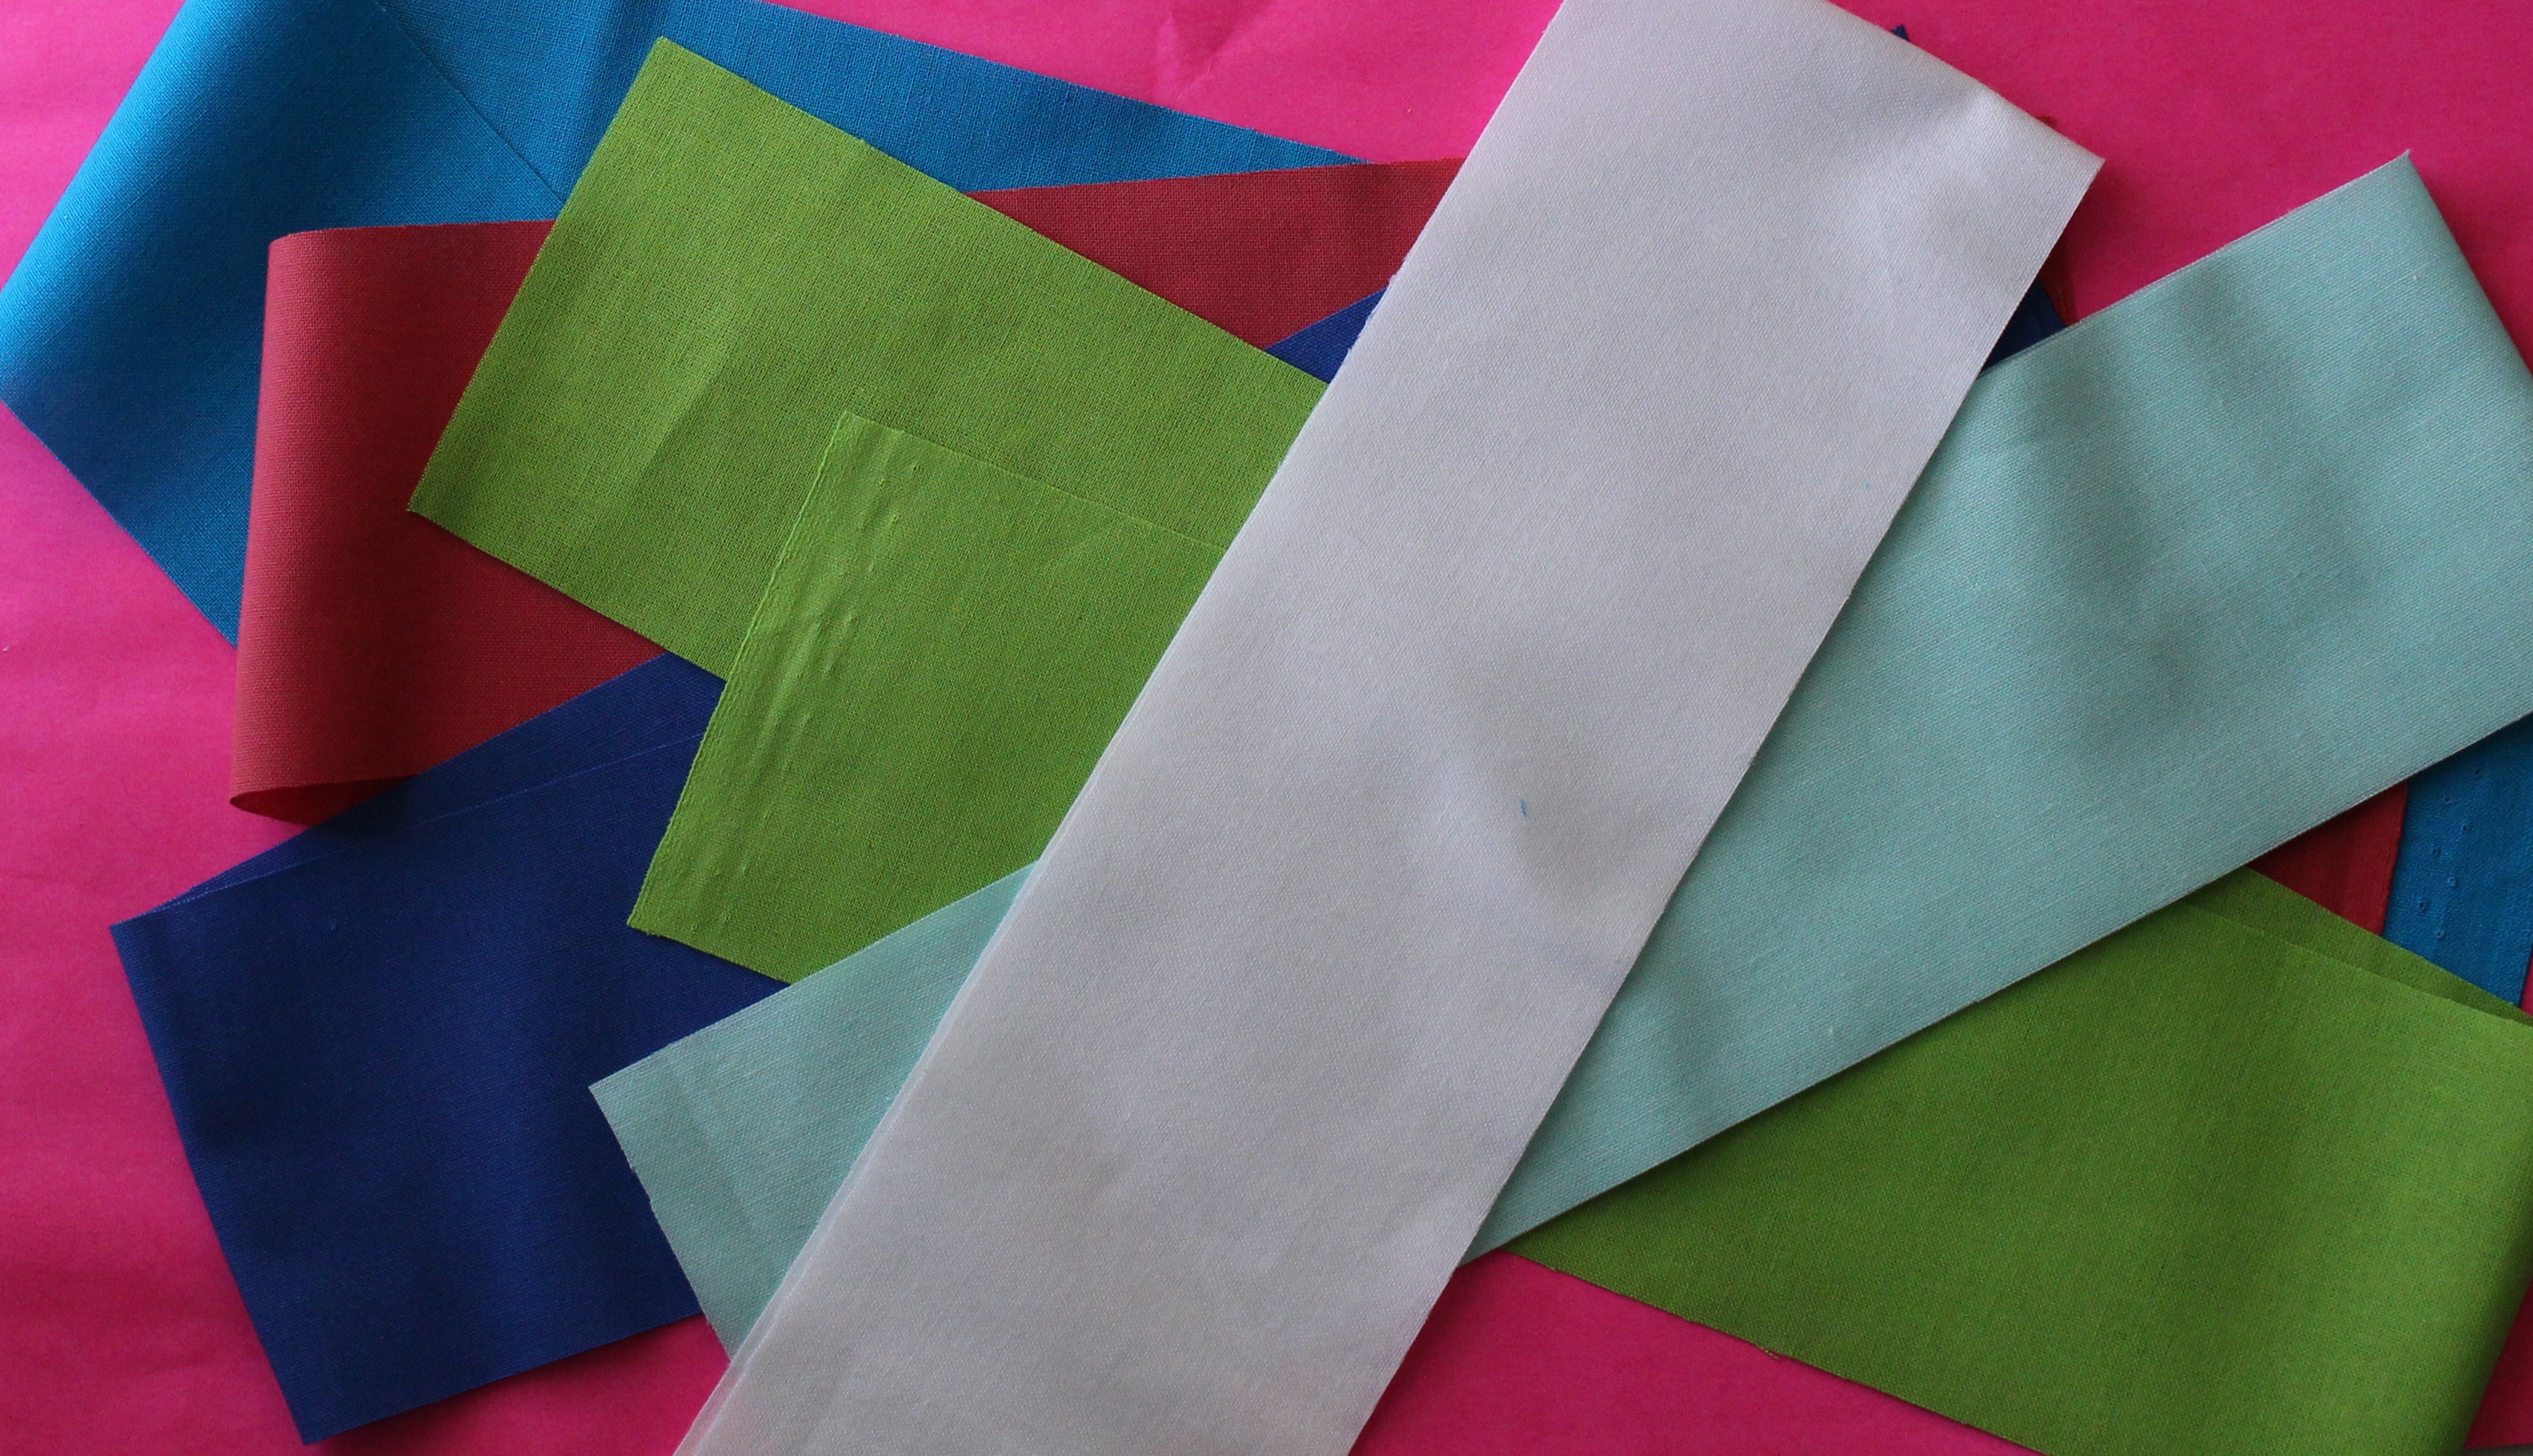
We received SIX FAT EIGHTHS from Fabri-Quilt, called the Watermelon Summer Bundle, one of each of the following colors:

Coral, Aqua, Turquoise, Chartreuse, Lapis and White

cut one strip three inches wide

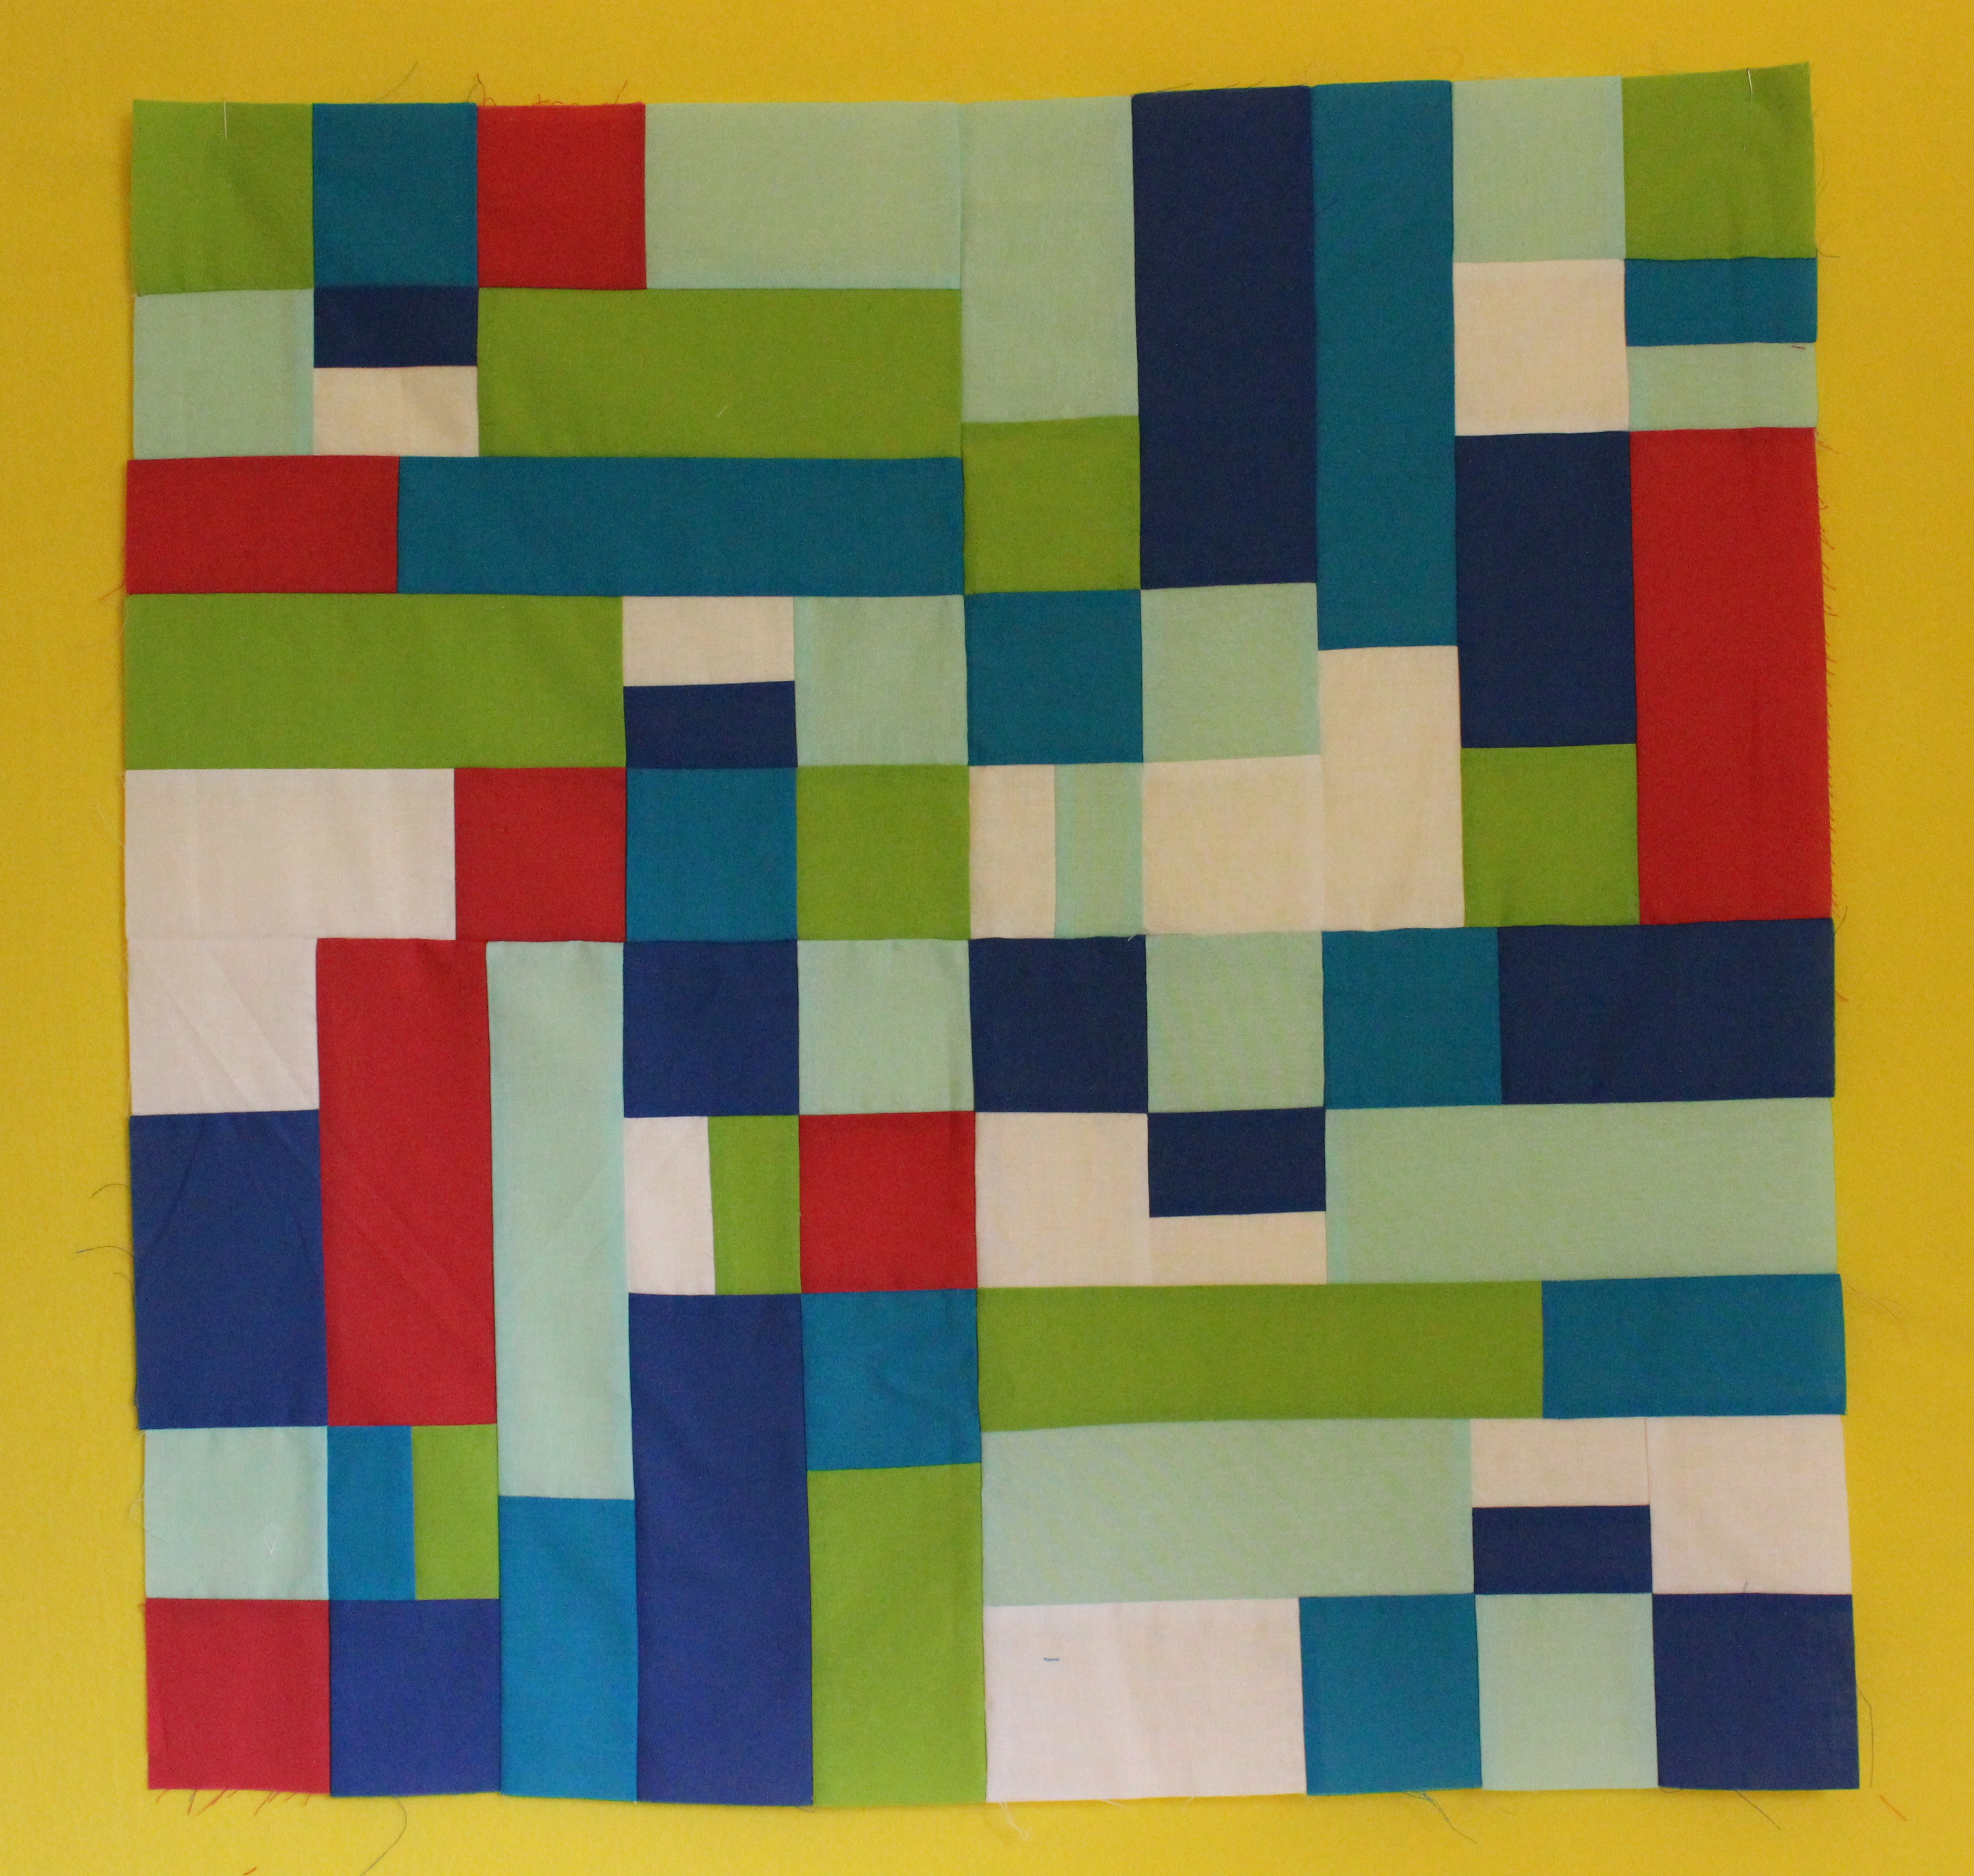
Because I was able to make FIVE (5) [12 1/2 by 12 1/2 unfinished] blocks out of the SIX FAT EIGHTHS, I gave each of the blocks a name, representing each of the hosts of the Blog Hop: Stephanie, CherylTerri Ann and Yvonne:

Subject to Change Mosiac

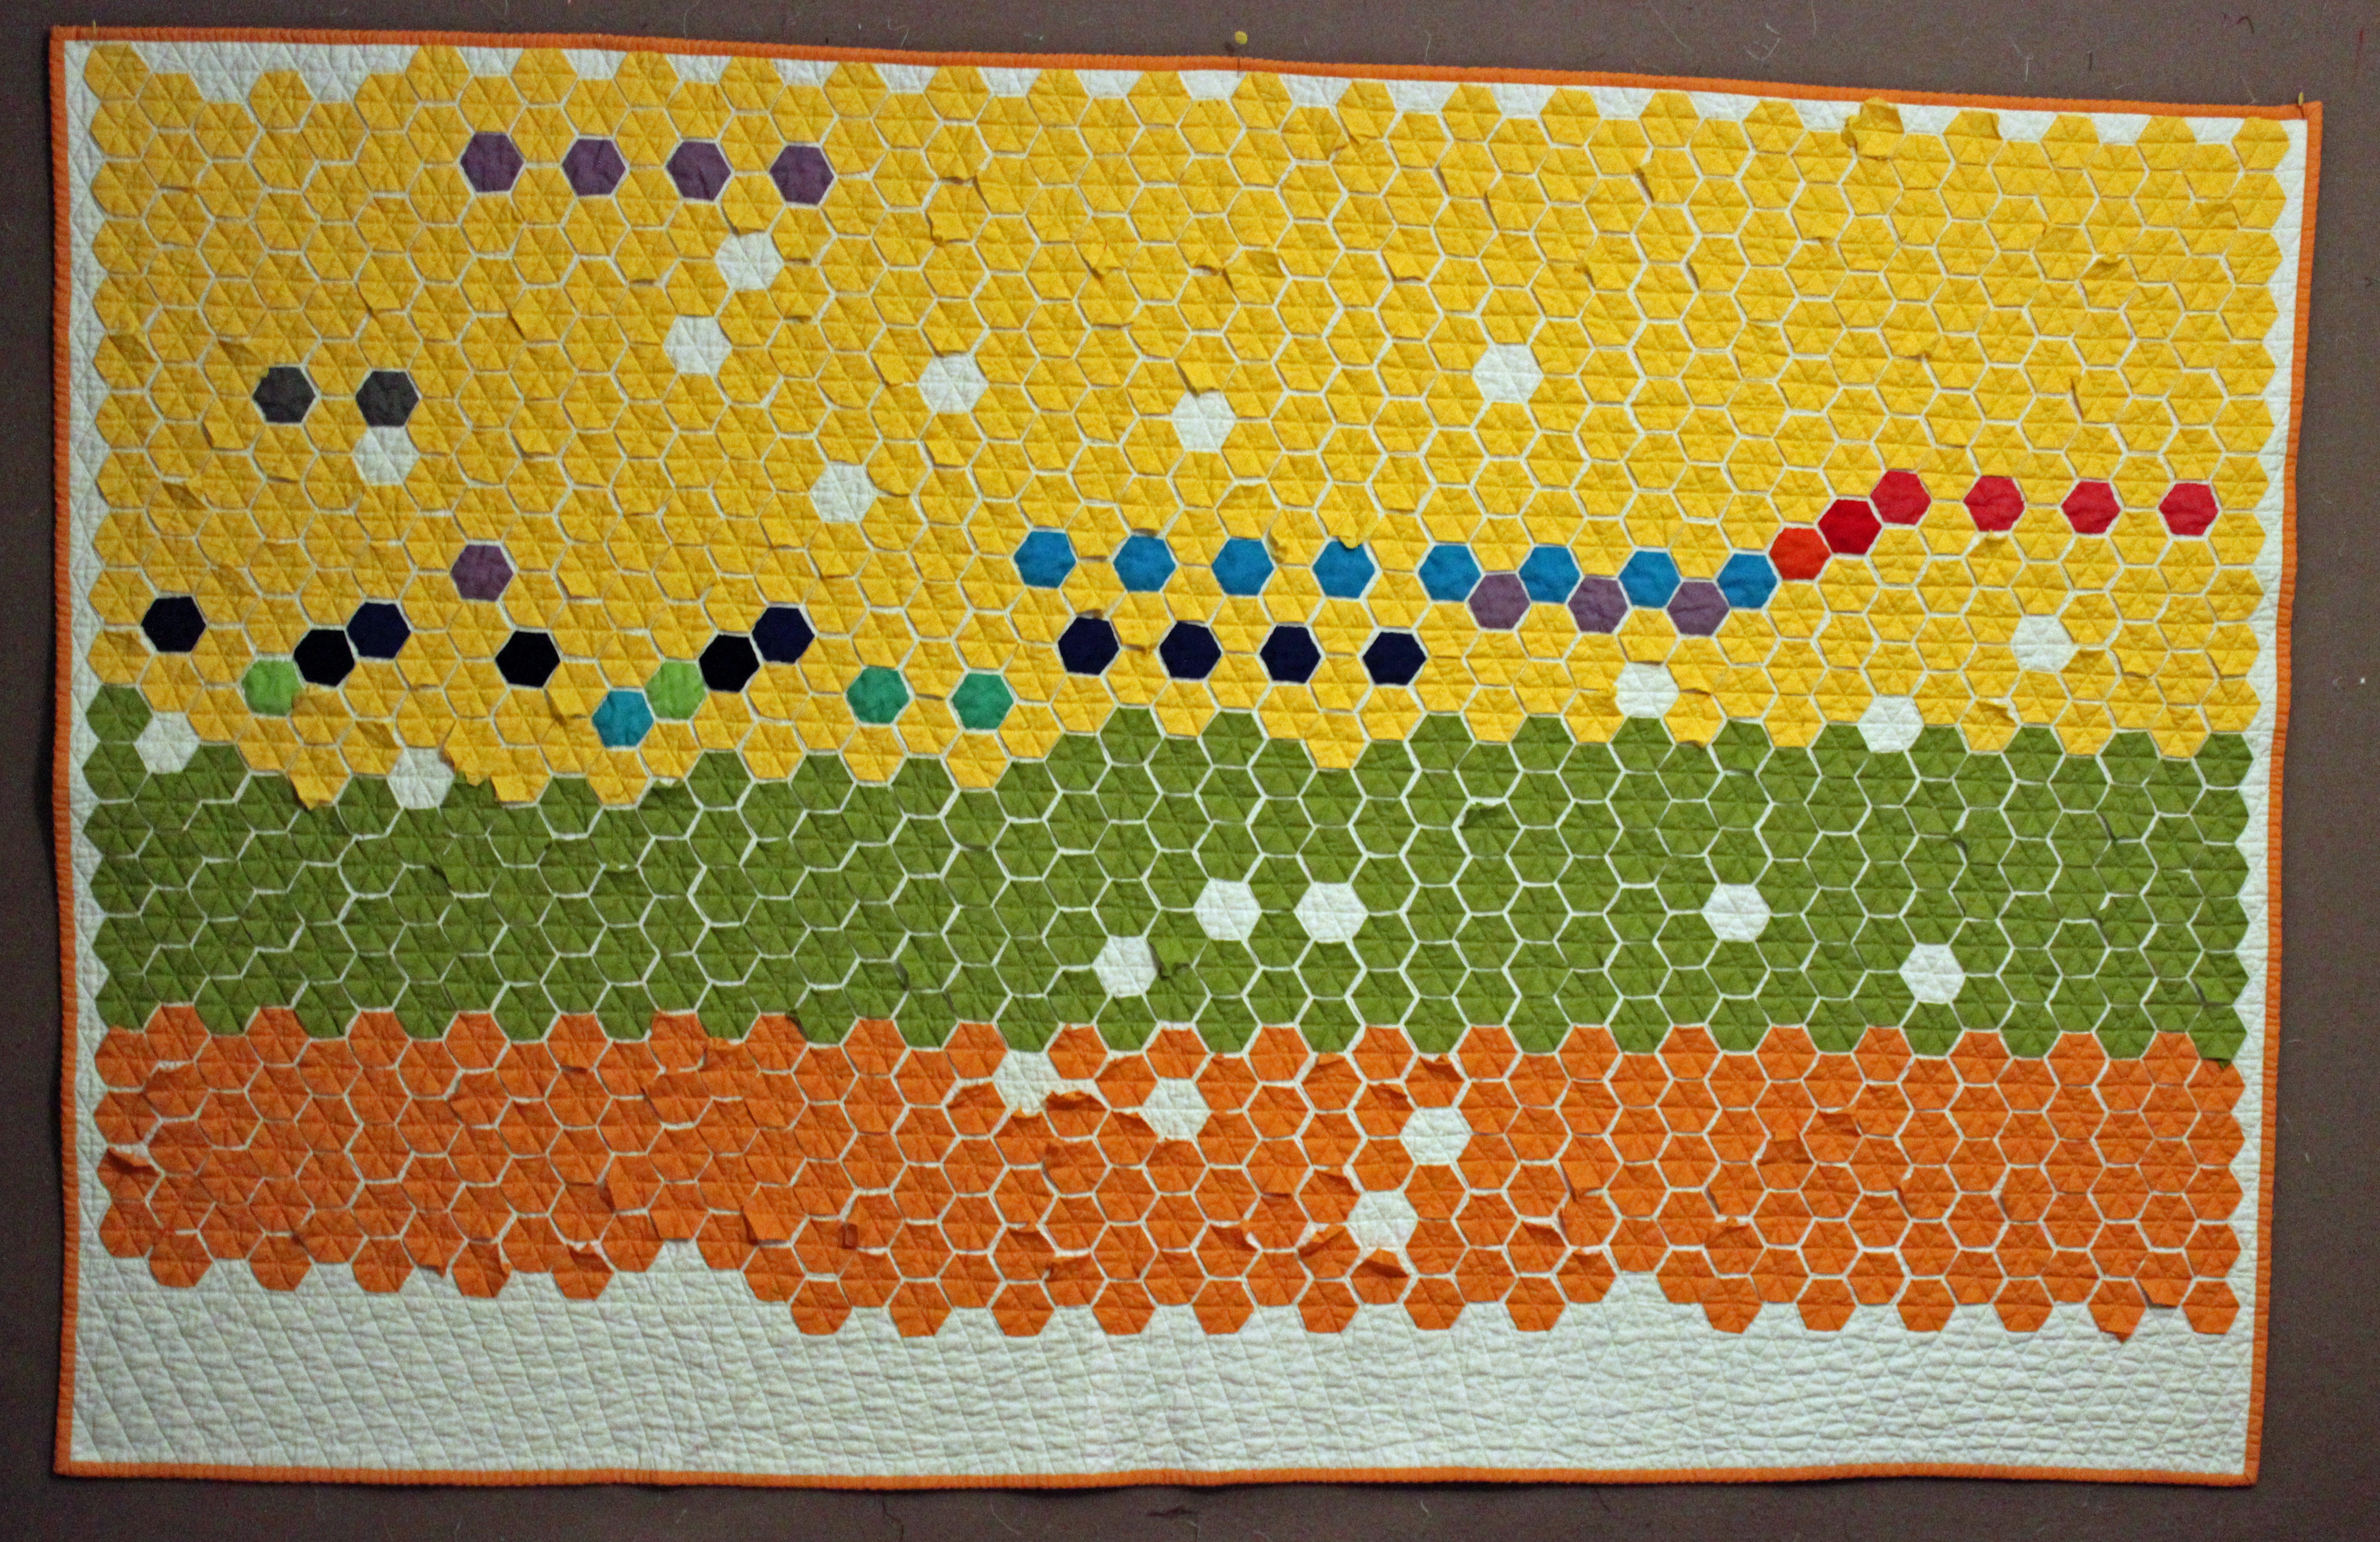
Once they are assembled you get a cool modern quilt. I turned each block so that the “four patches” were together in the middle:
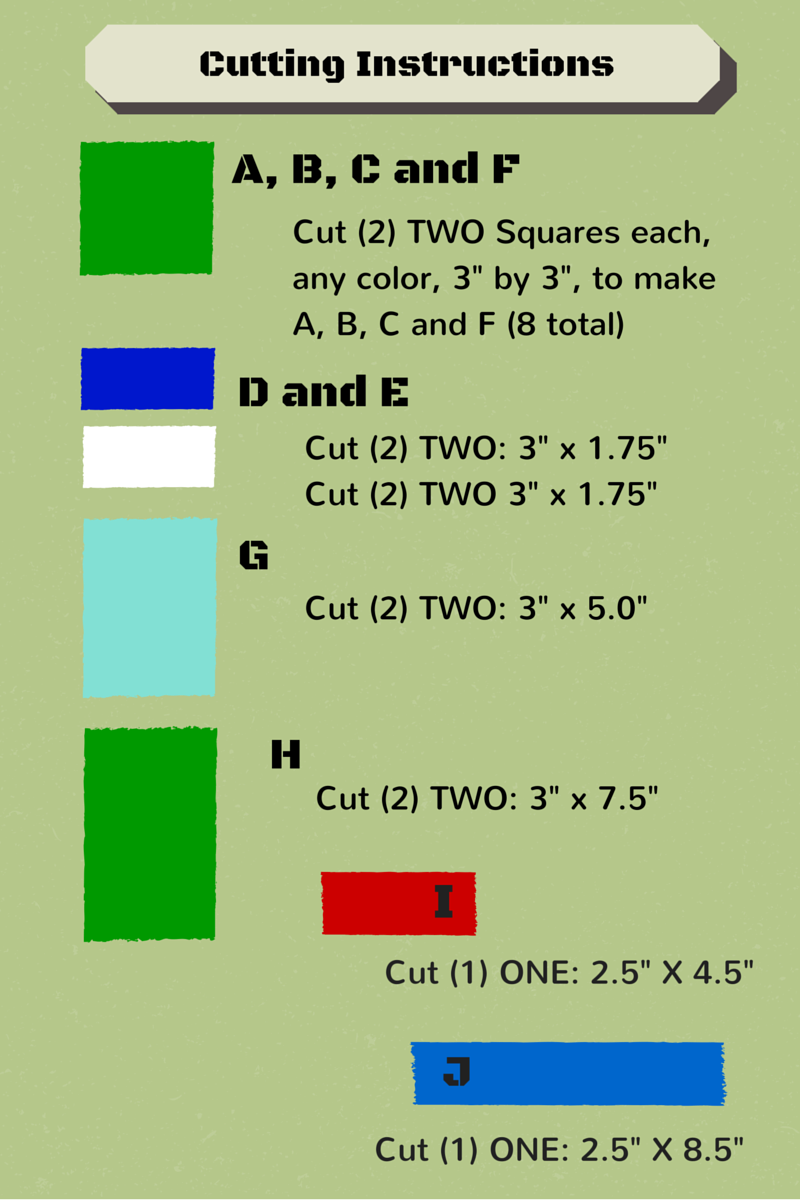
Subject to Change Four Patch

Let’s Get Started:

TIPS:

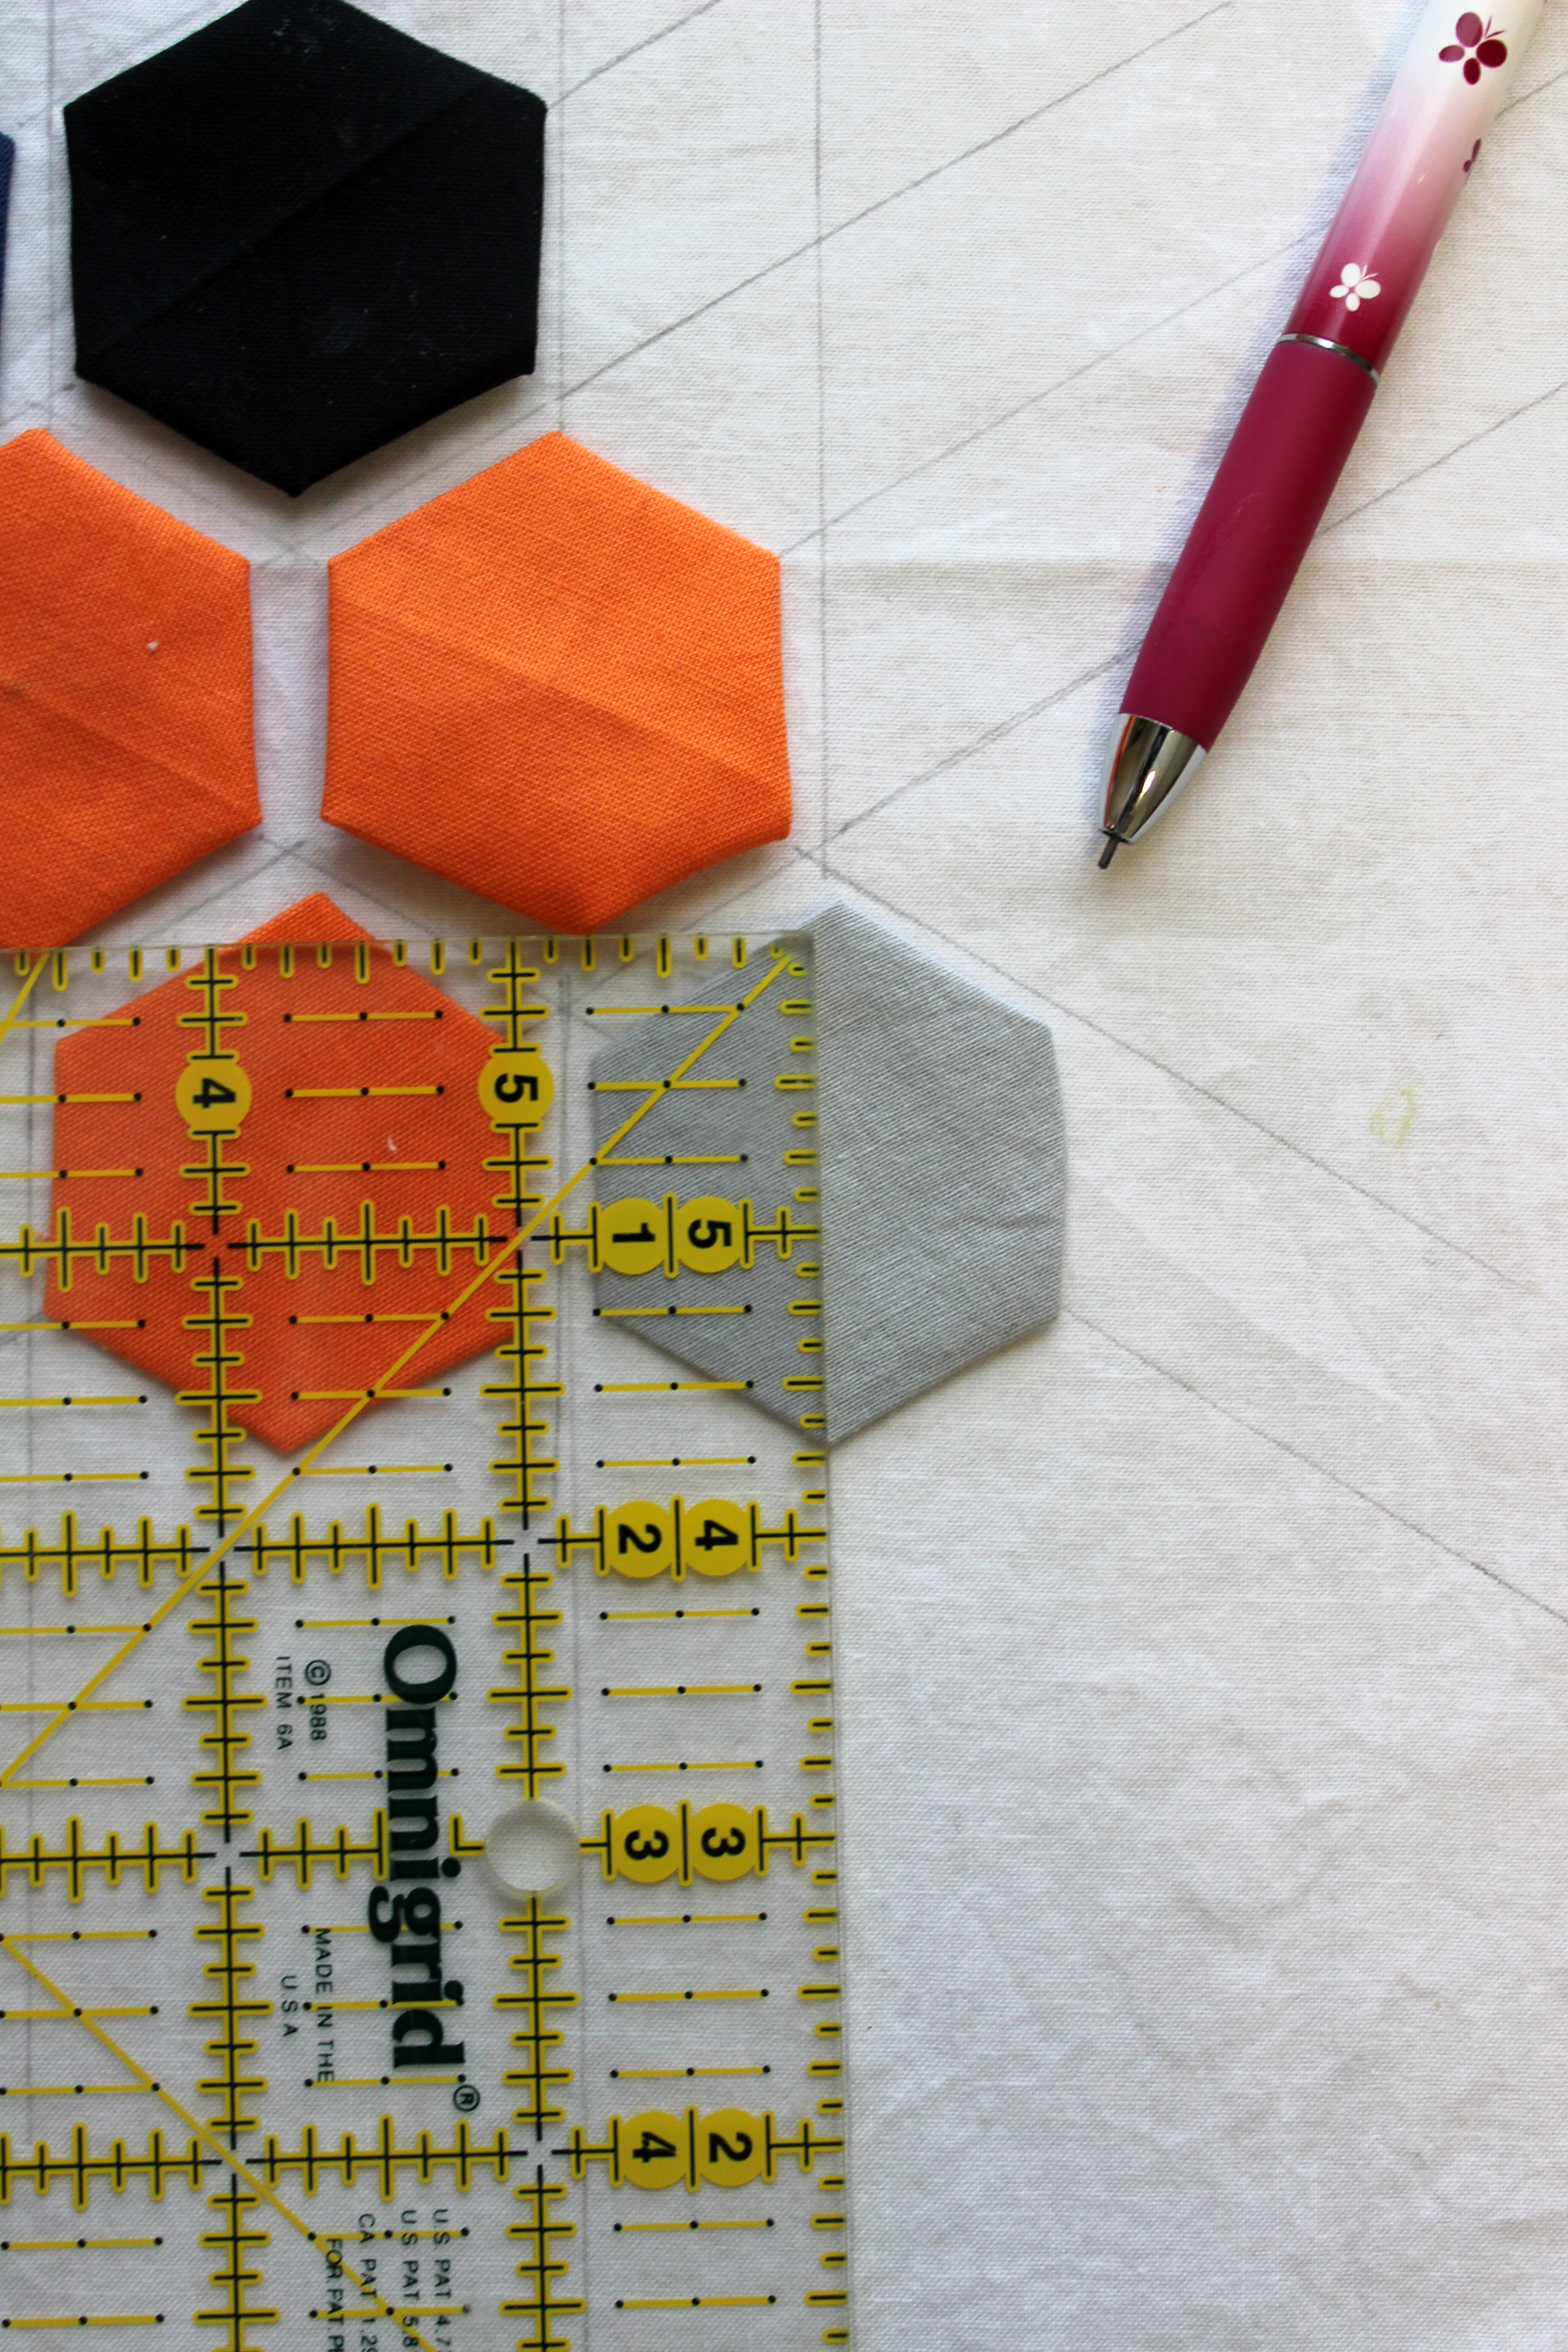
You can cut the fat eighths into three strips: (2) 3″ wide by the length of each fat eighth and one (1) strip 2 1/2″ wide by the length of the fat eighth.

subject to change Cutting Instructions

Subject to Change Assembly Page One

Subject to Change Assembly Page Two

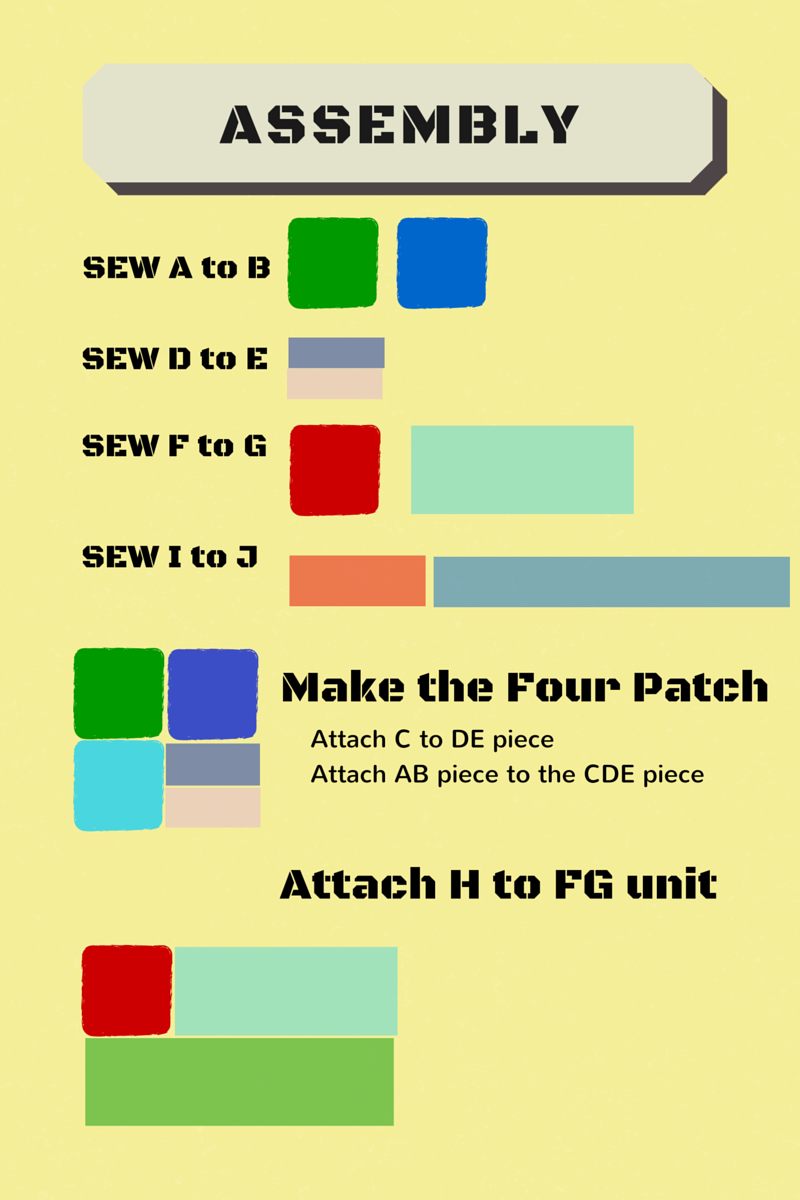
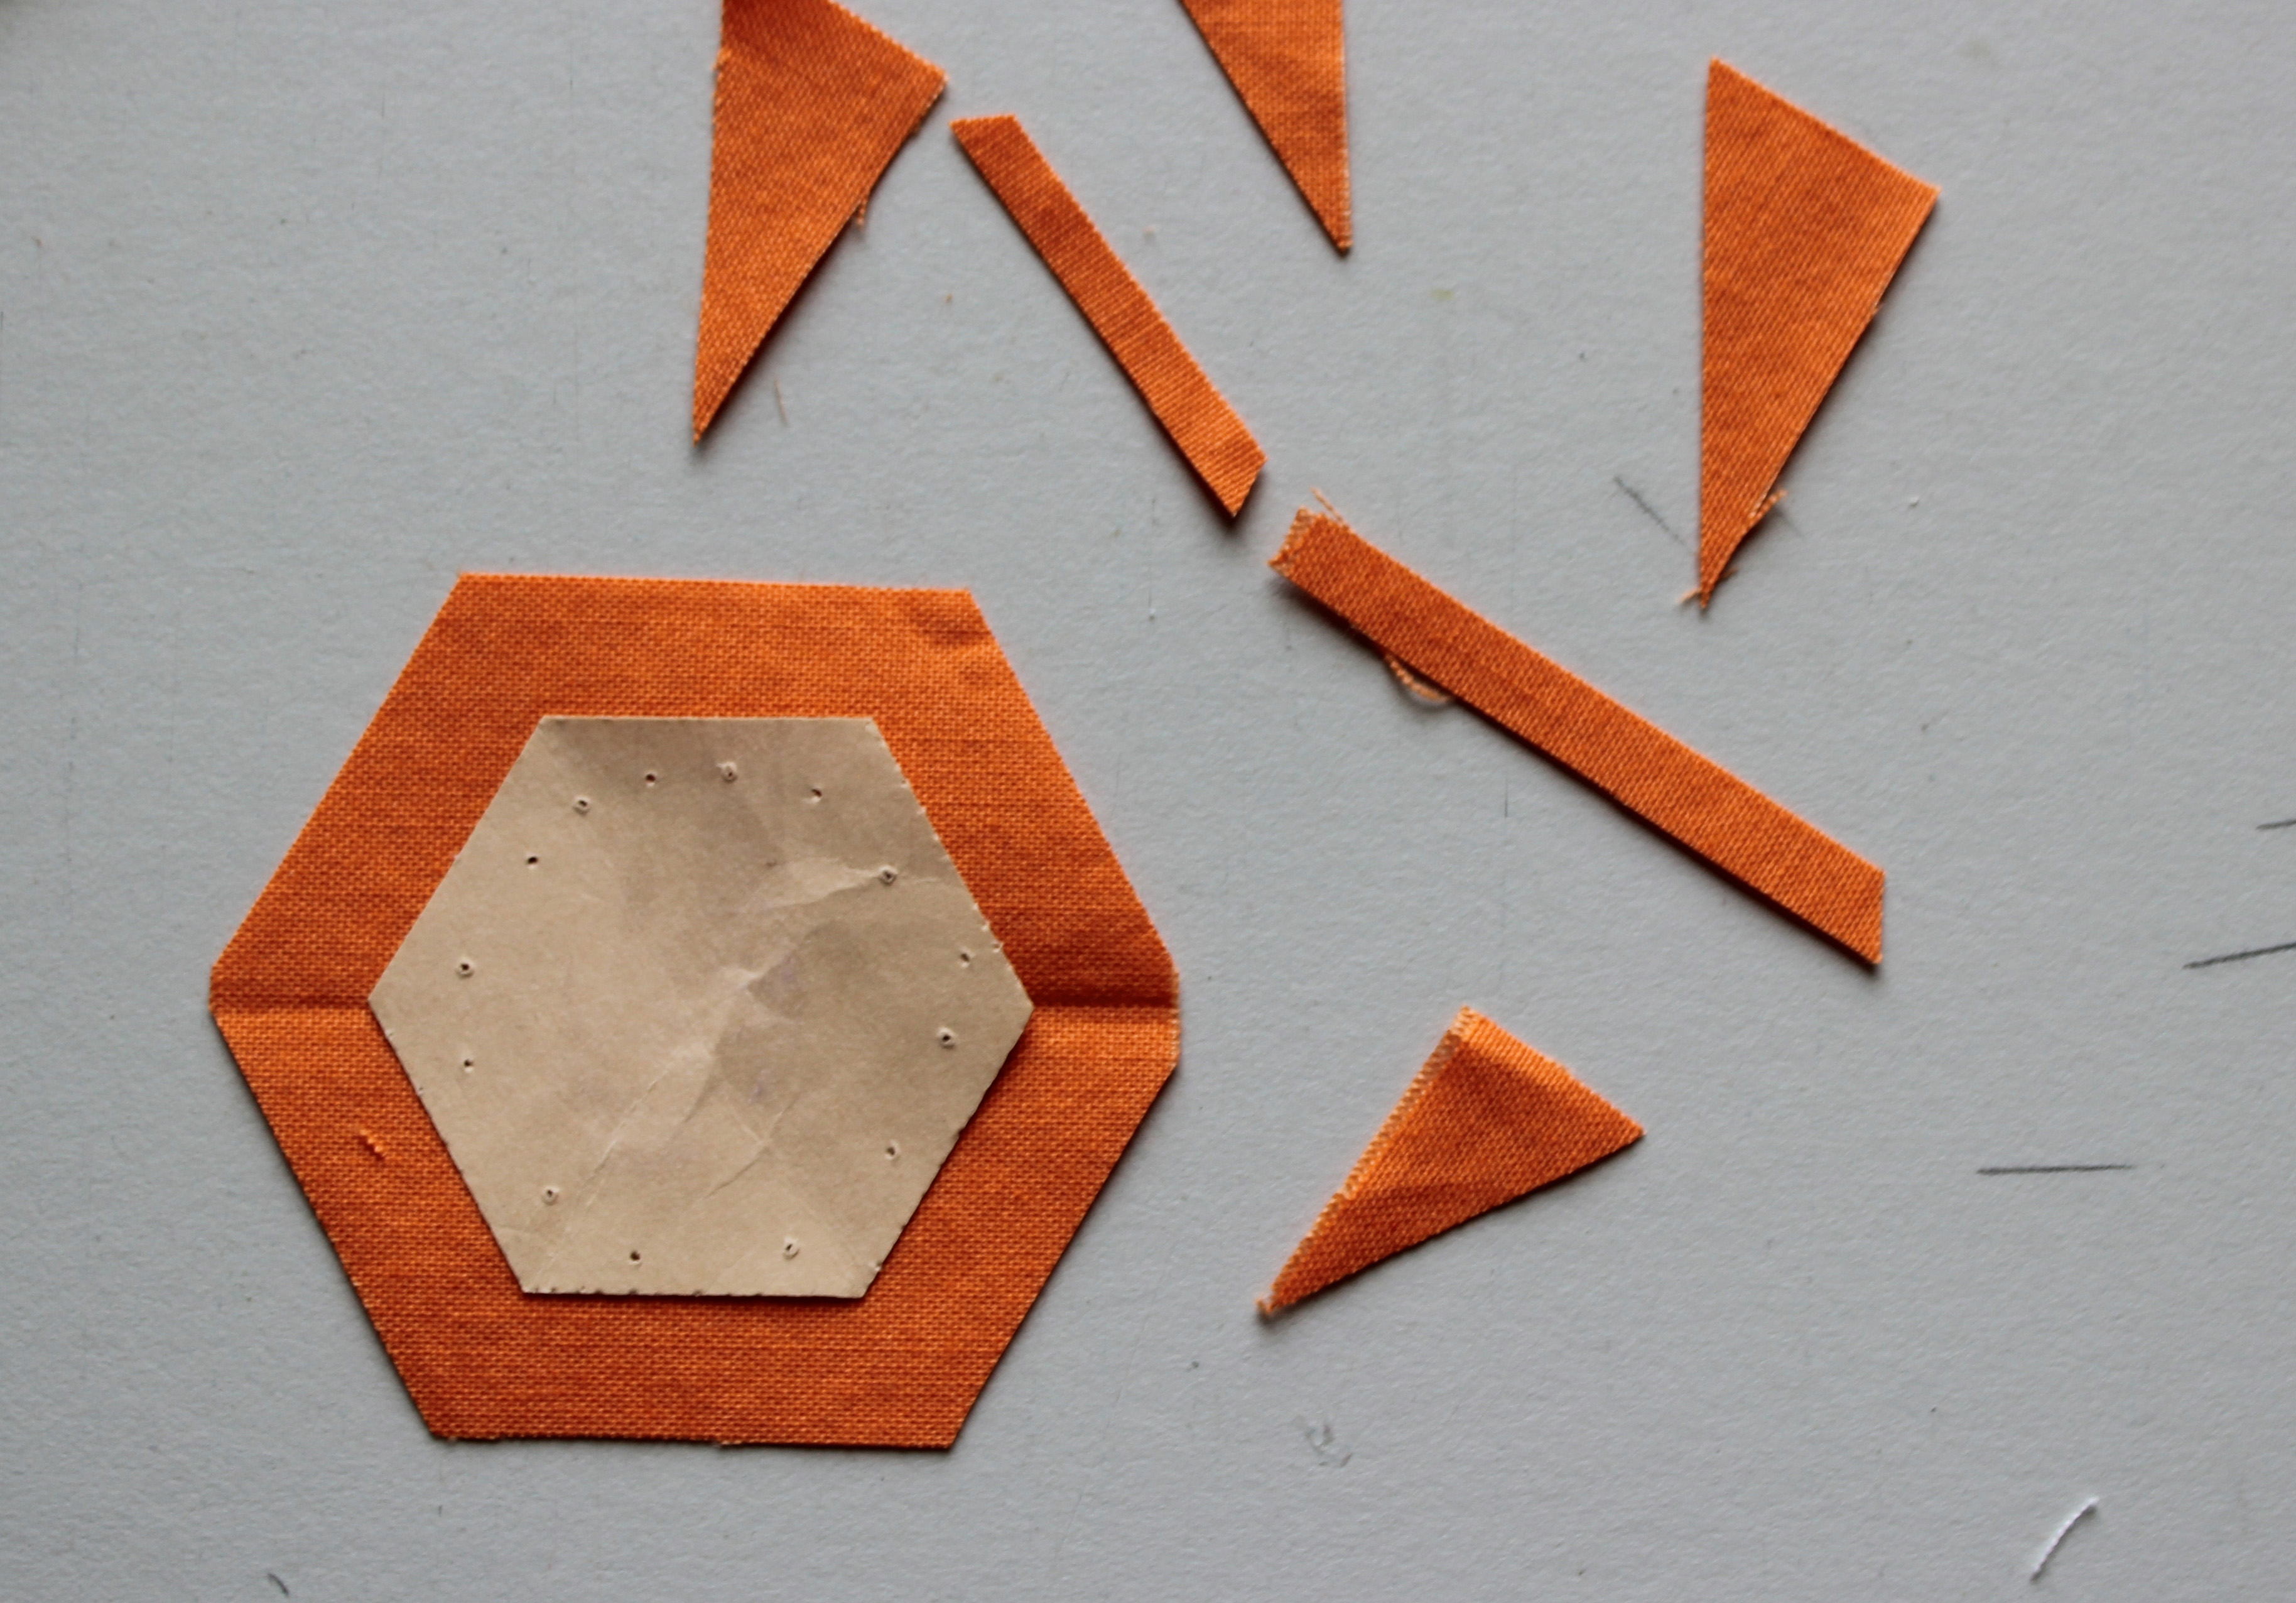
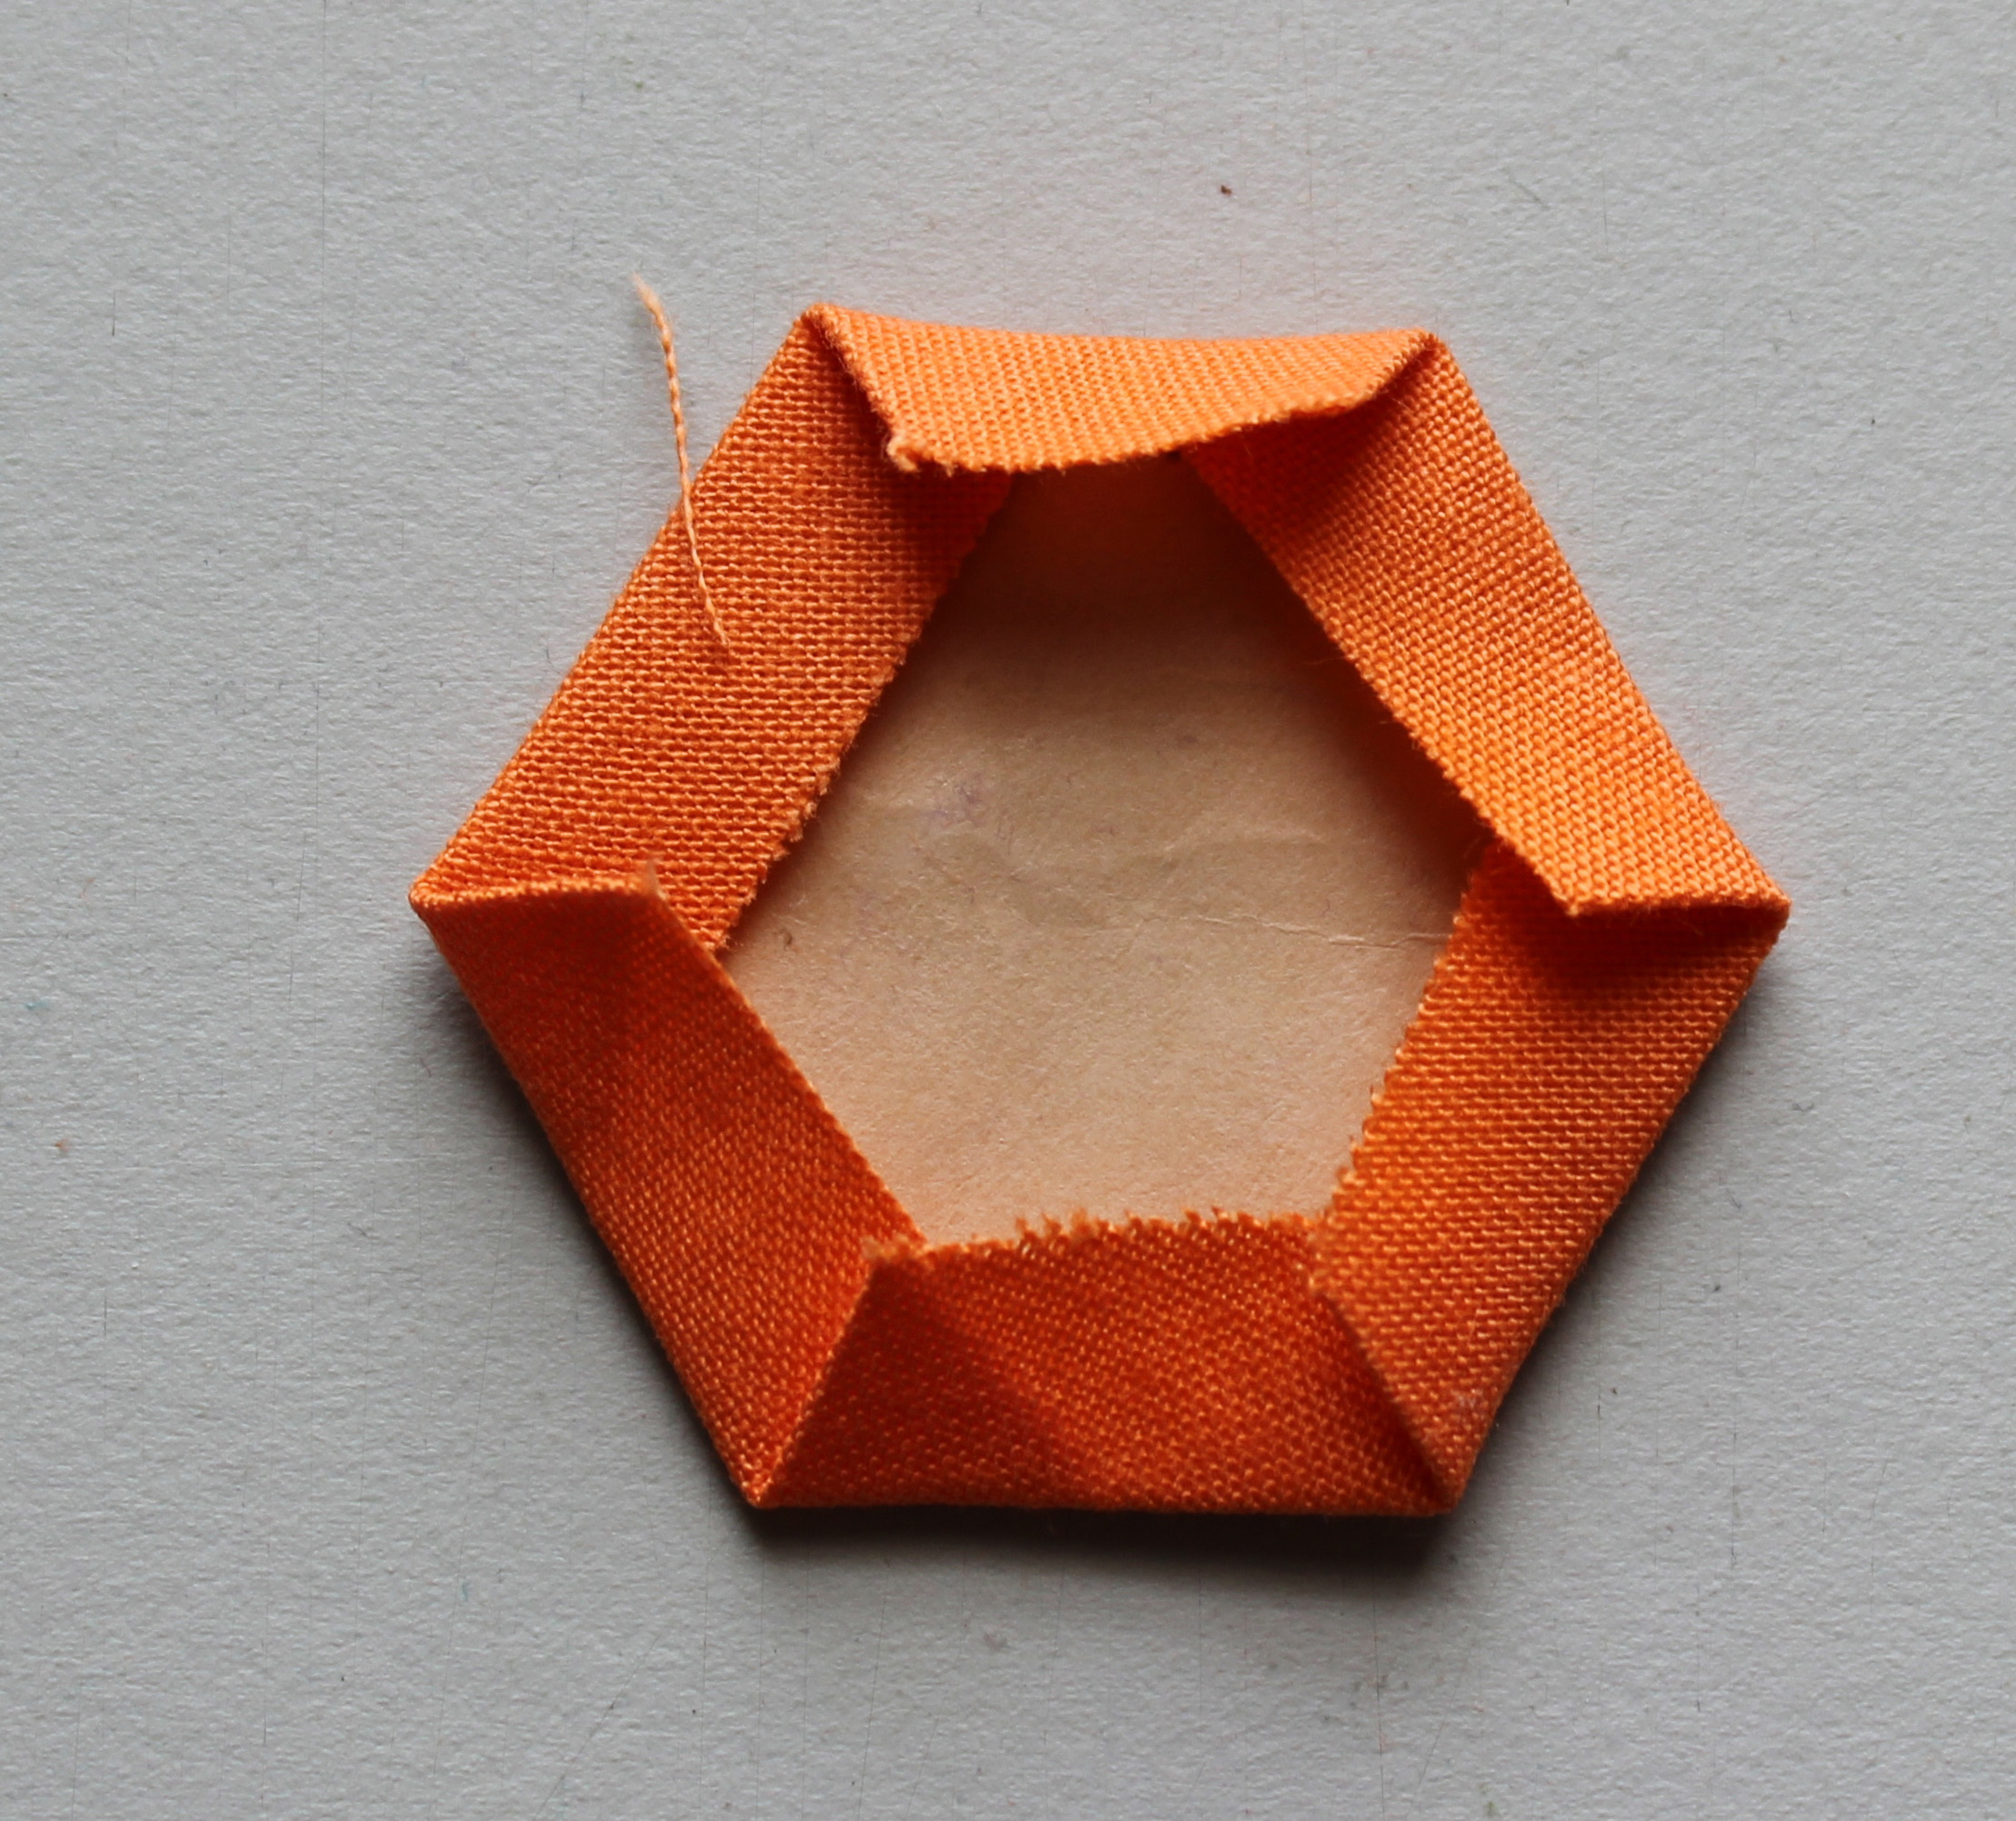
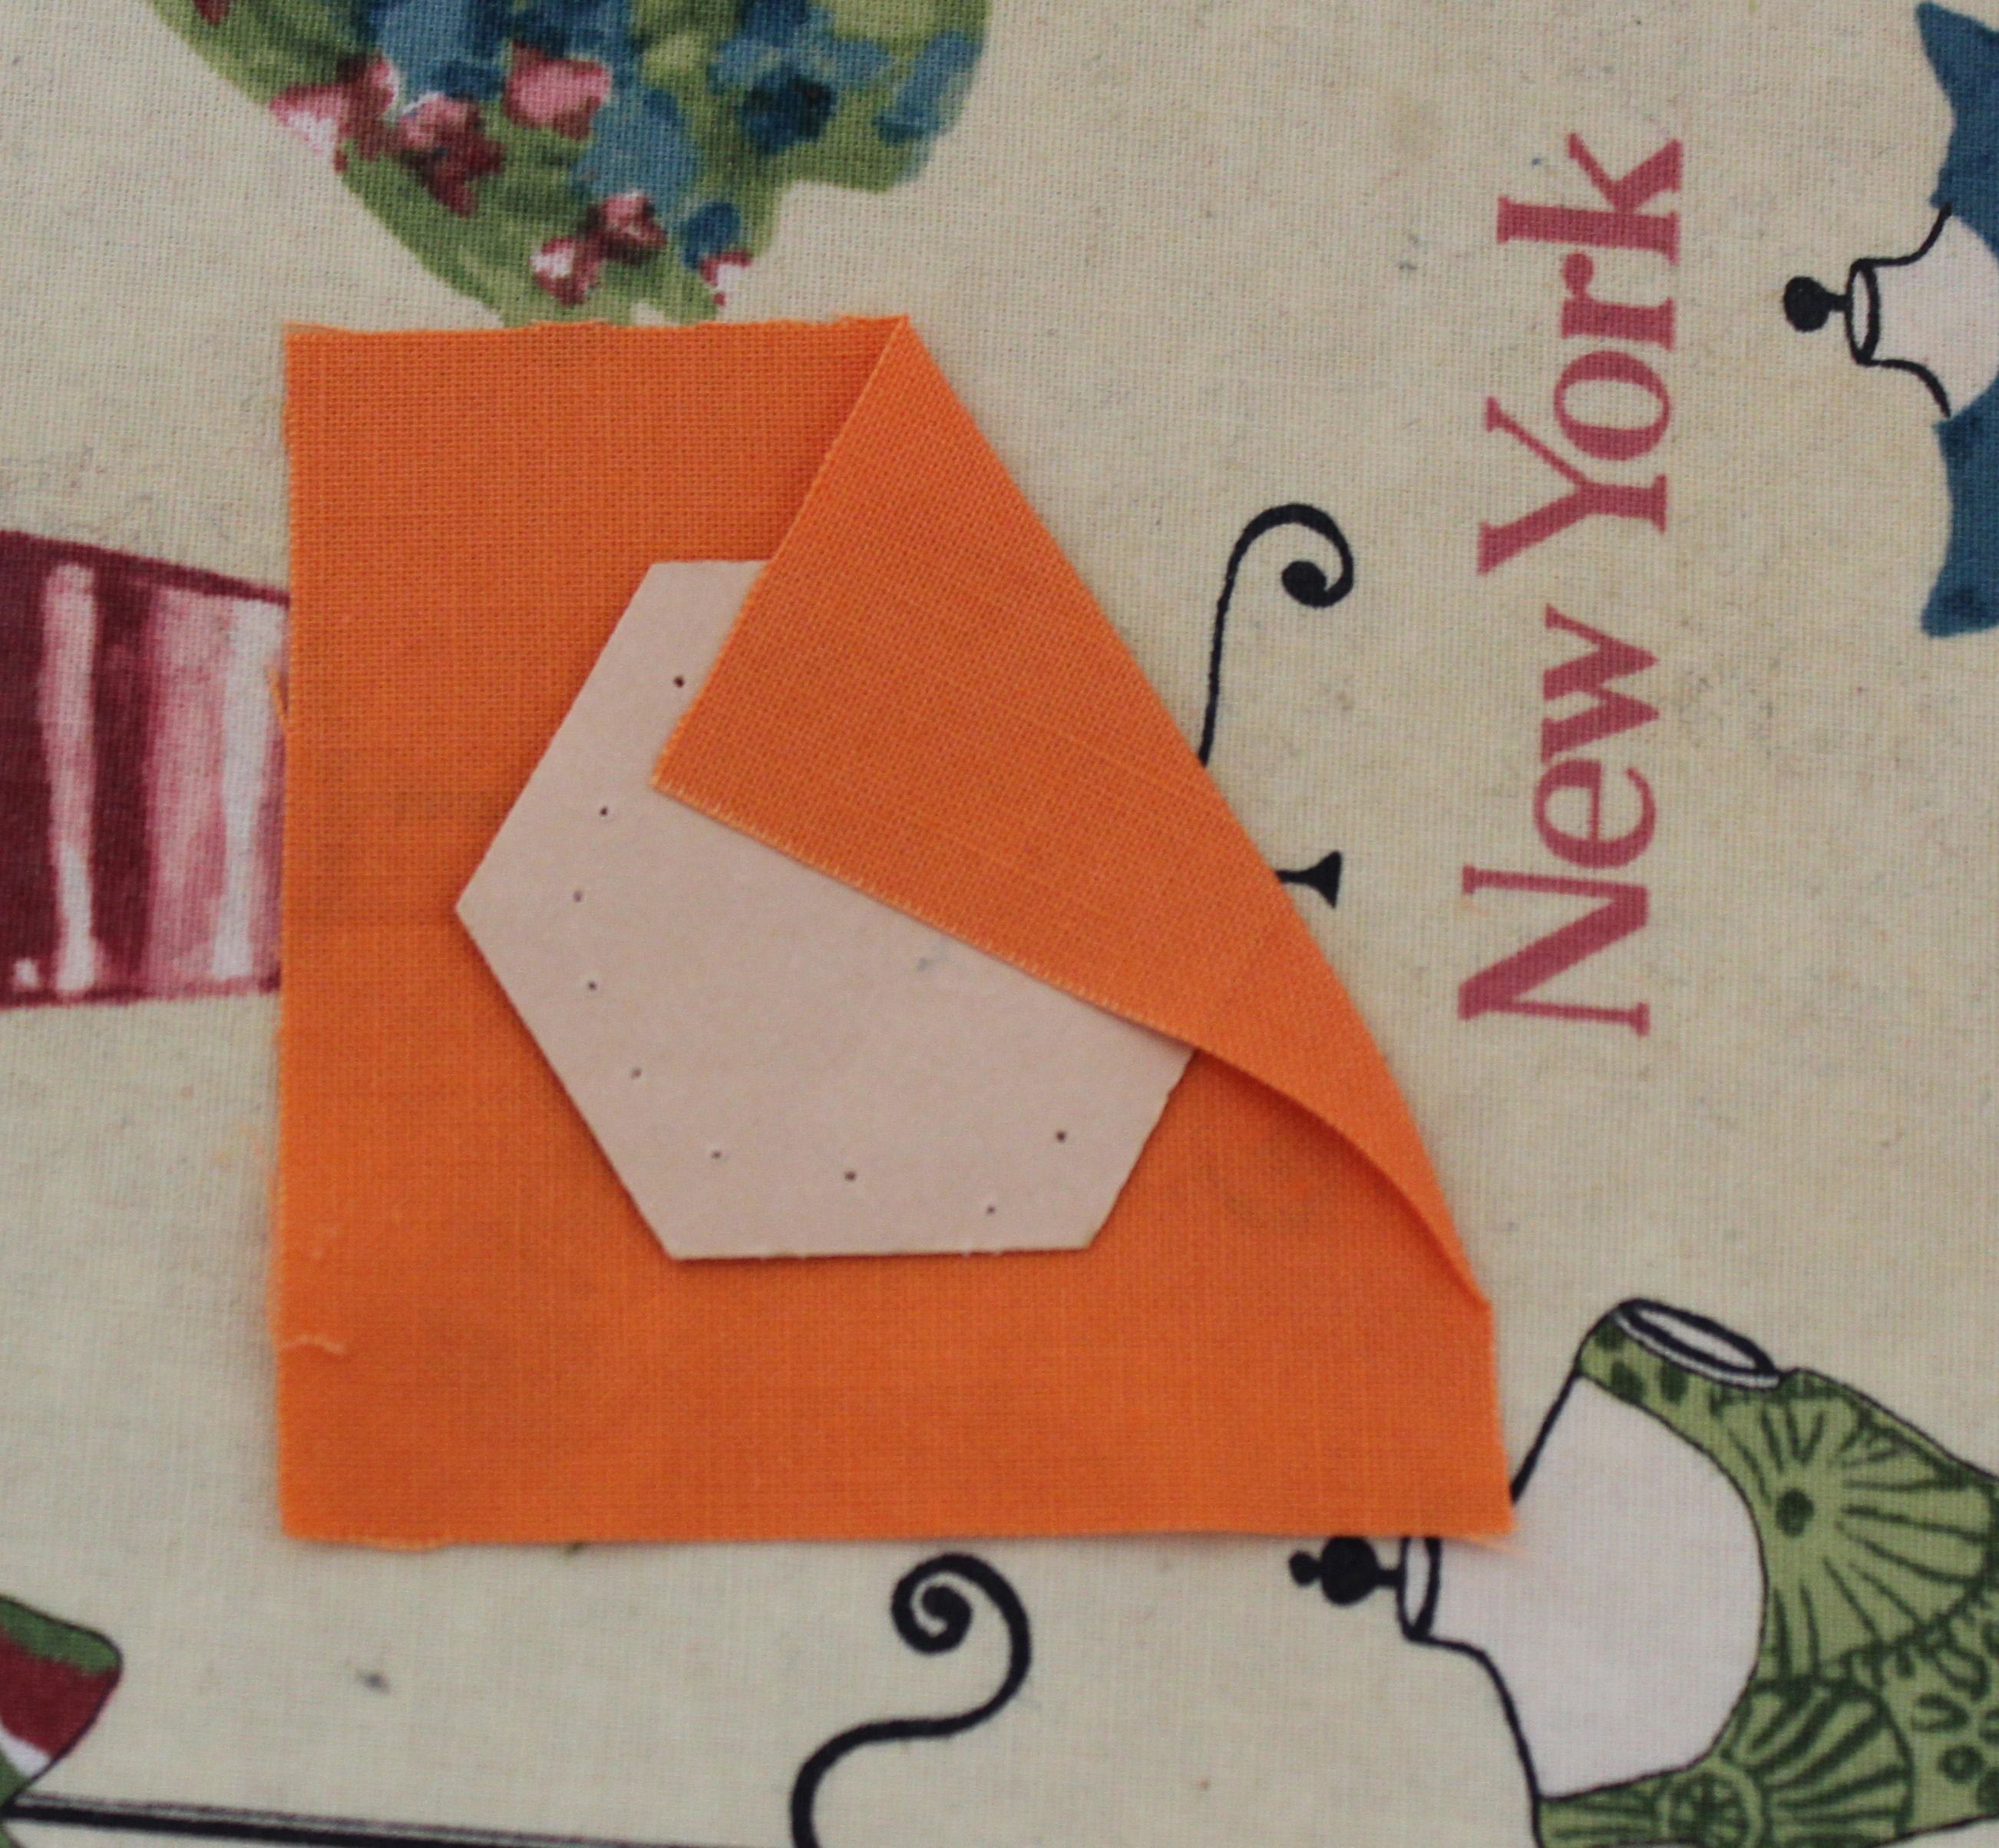
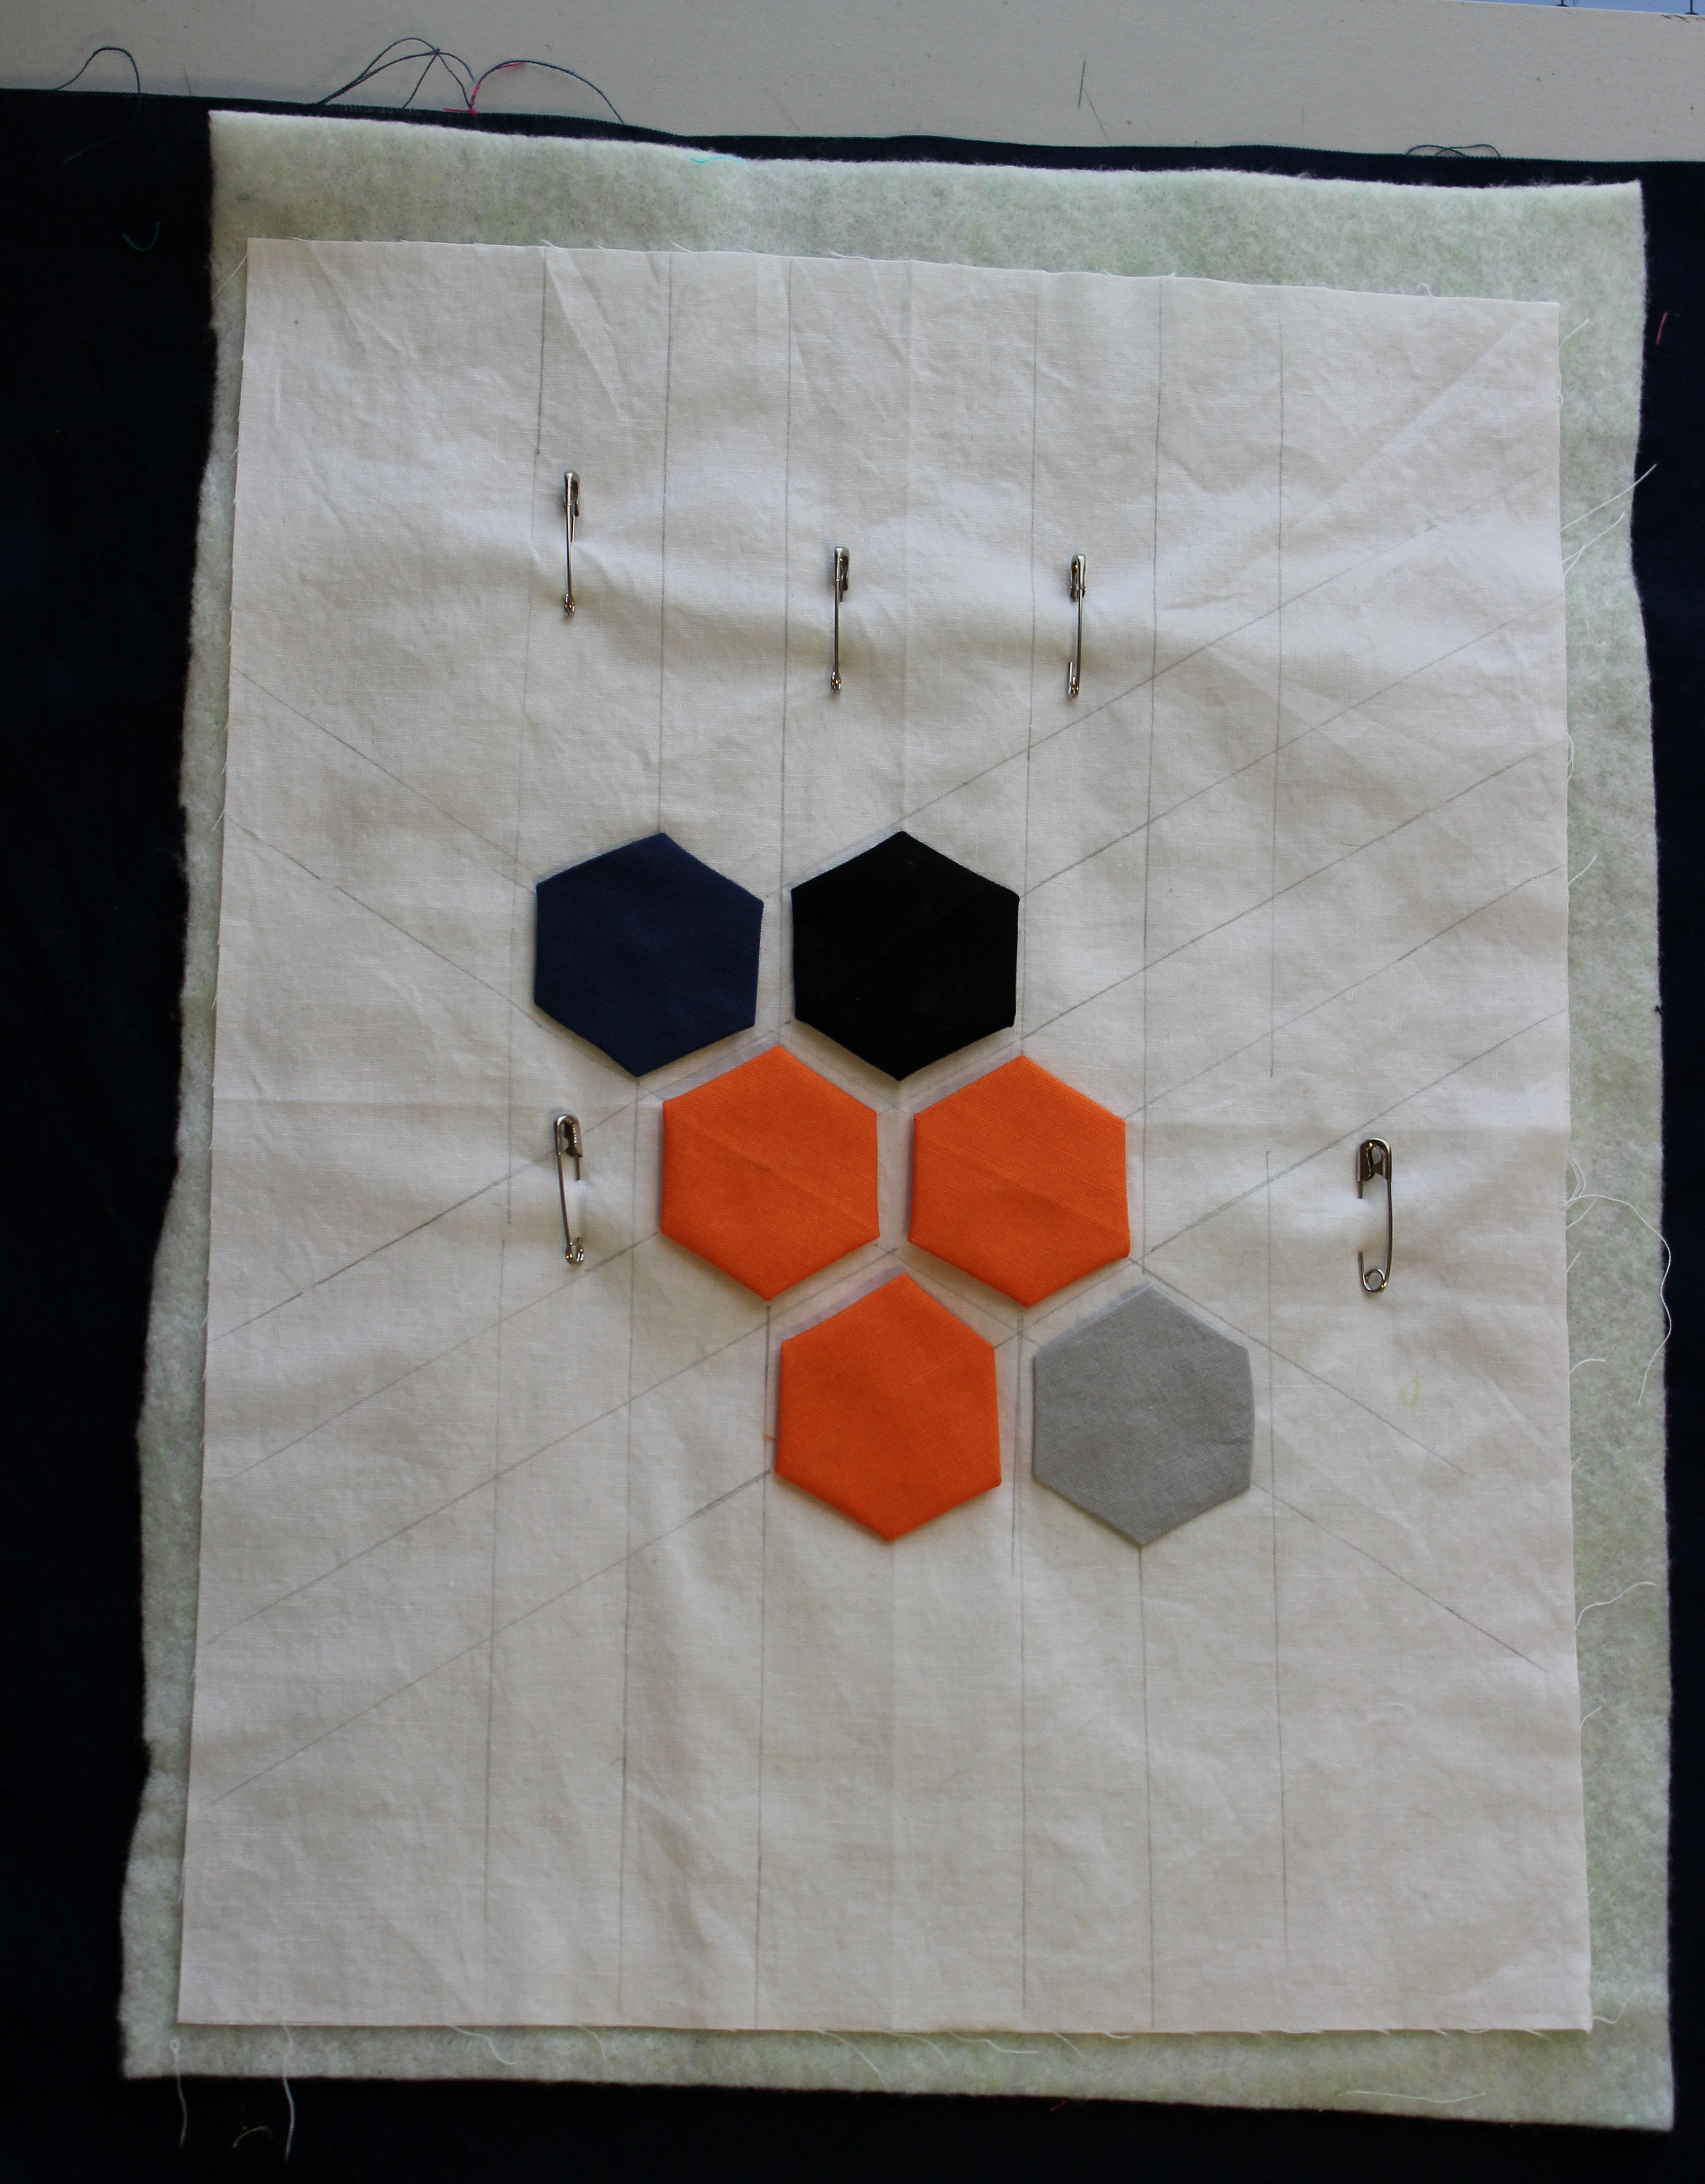
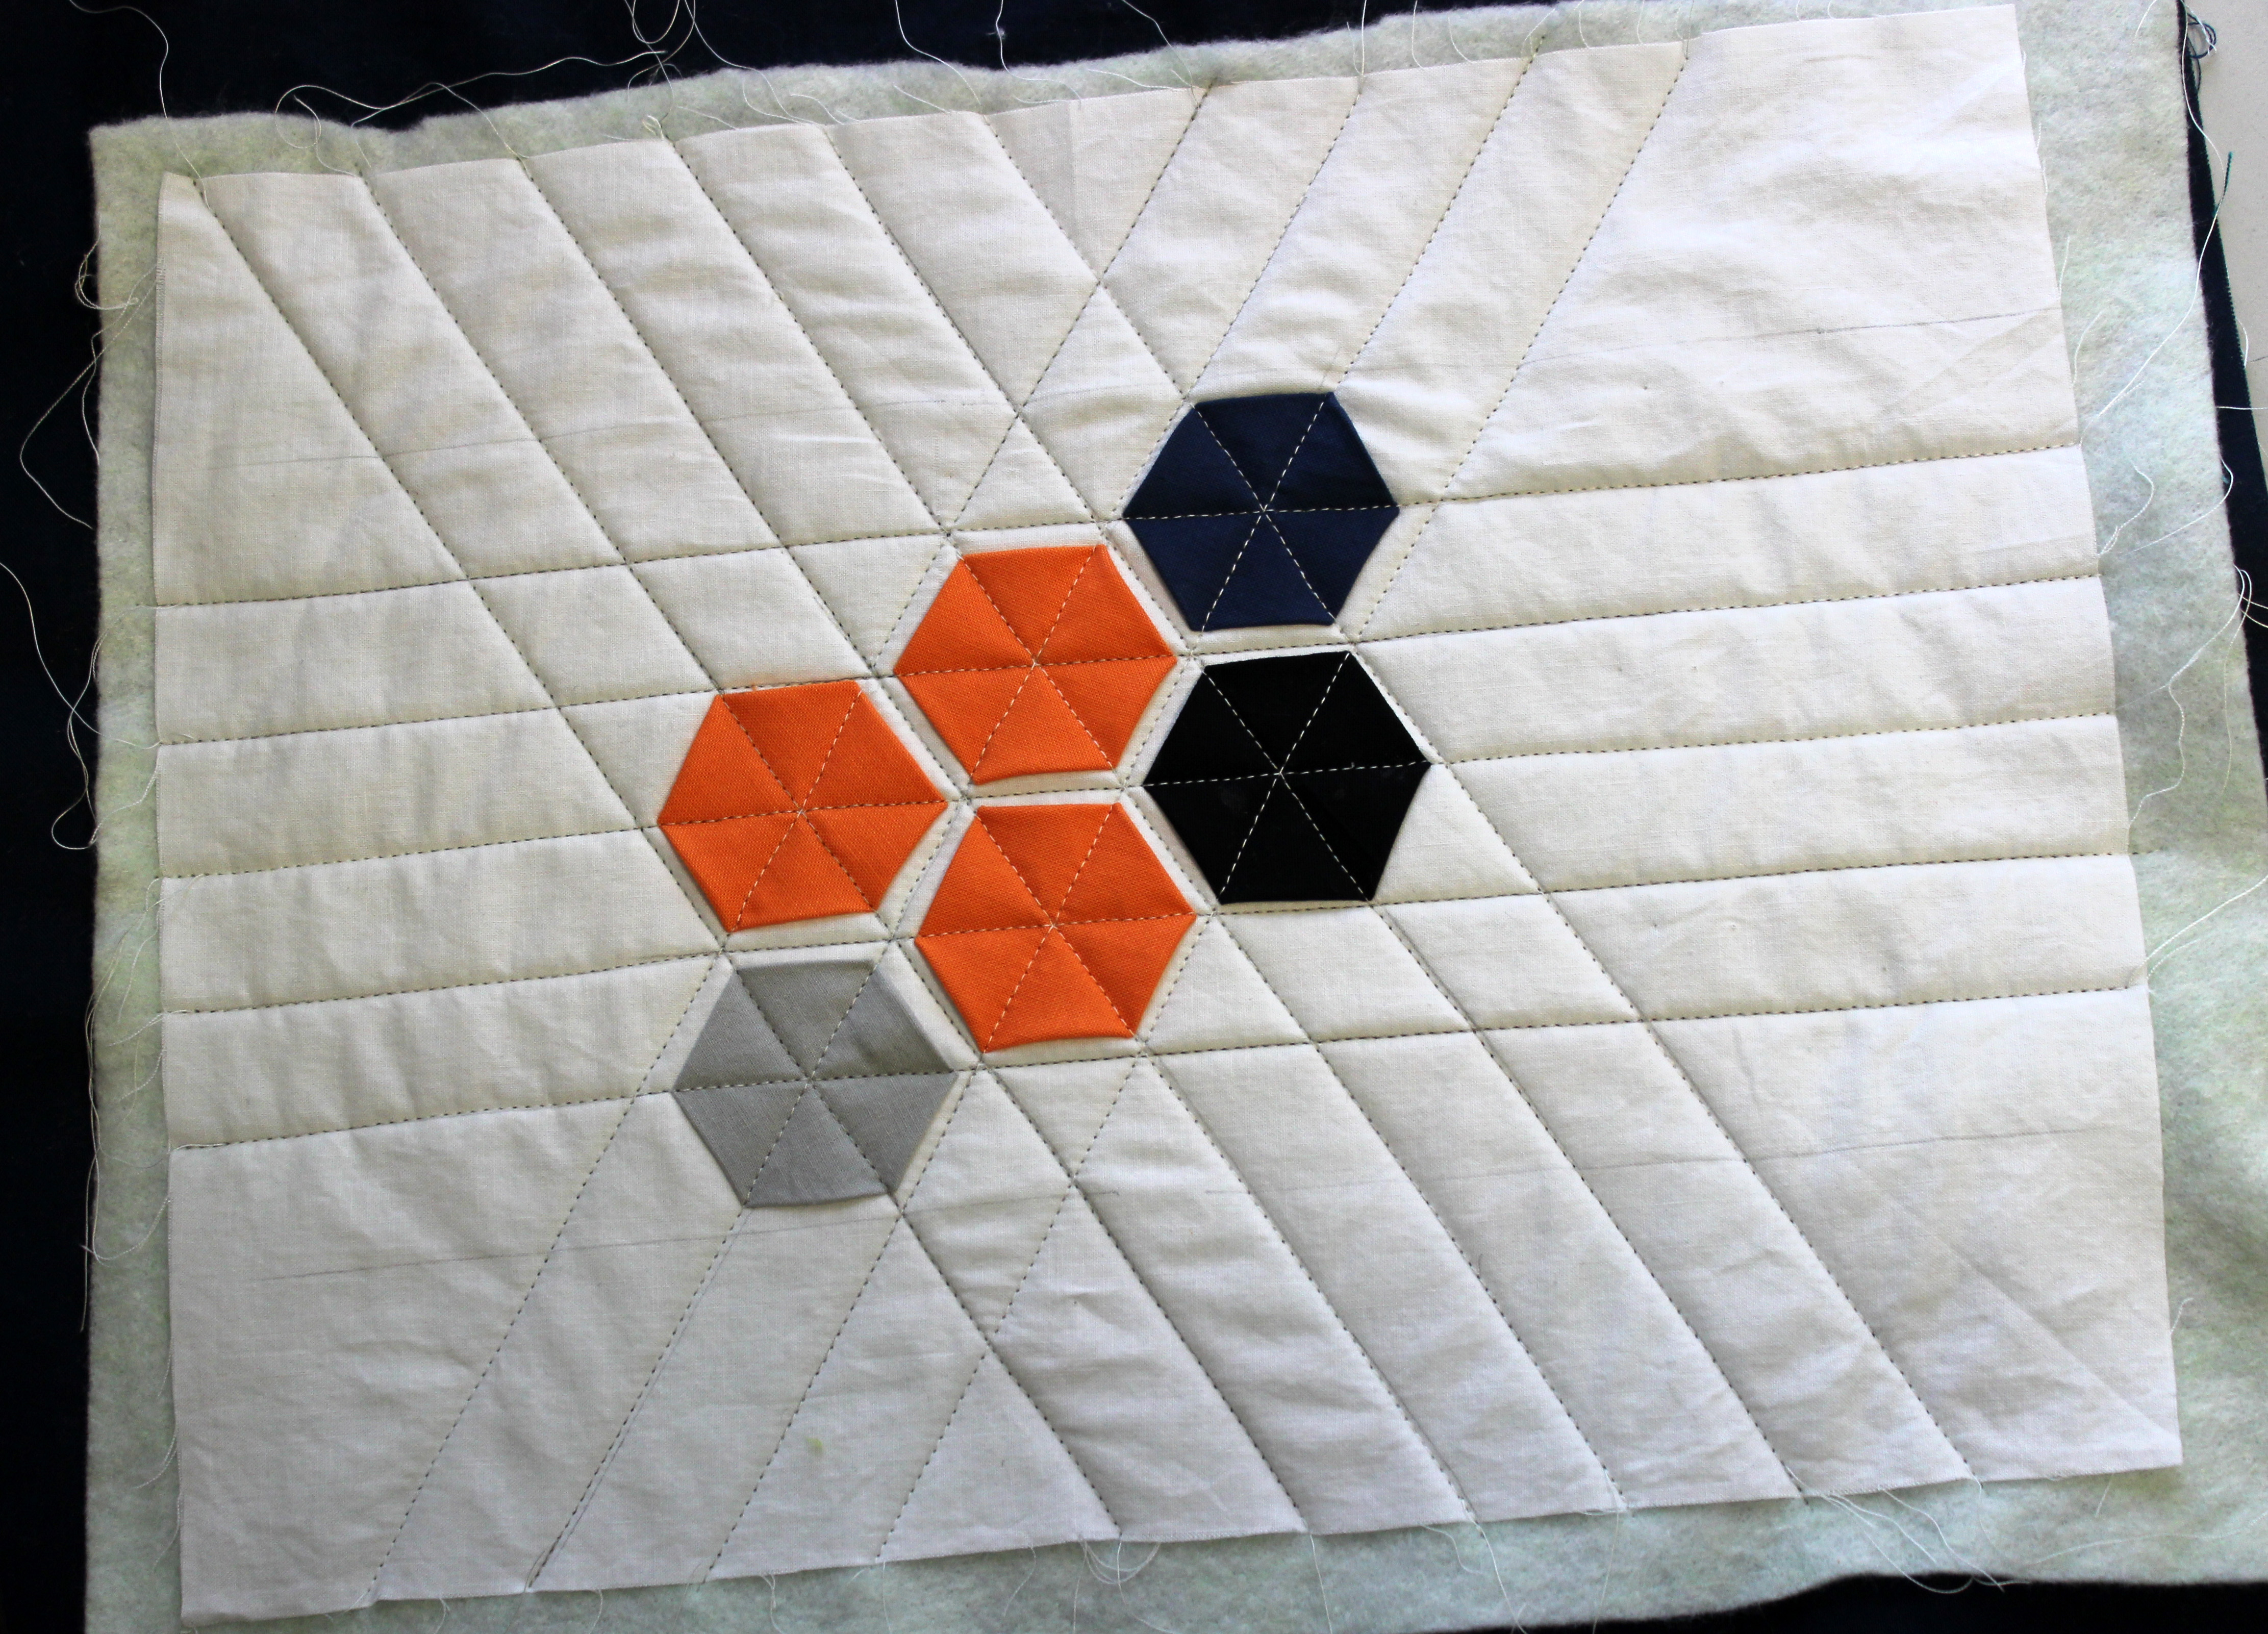
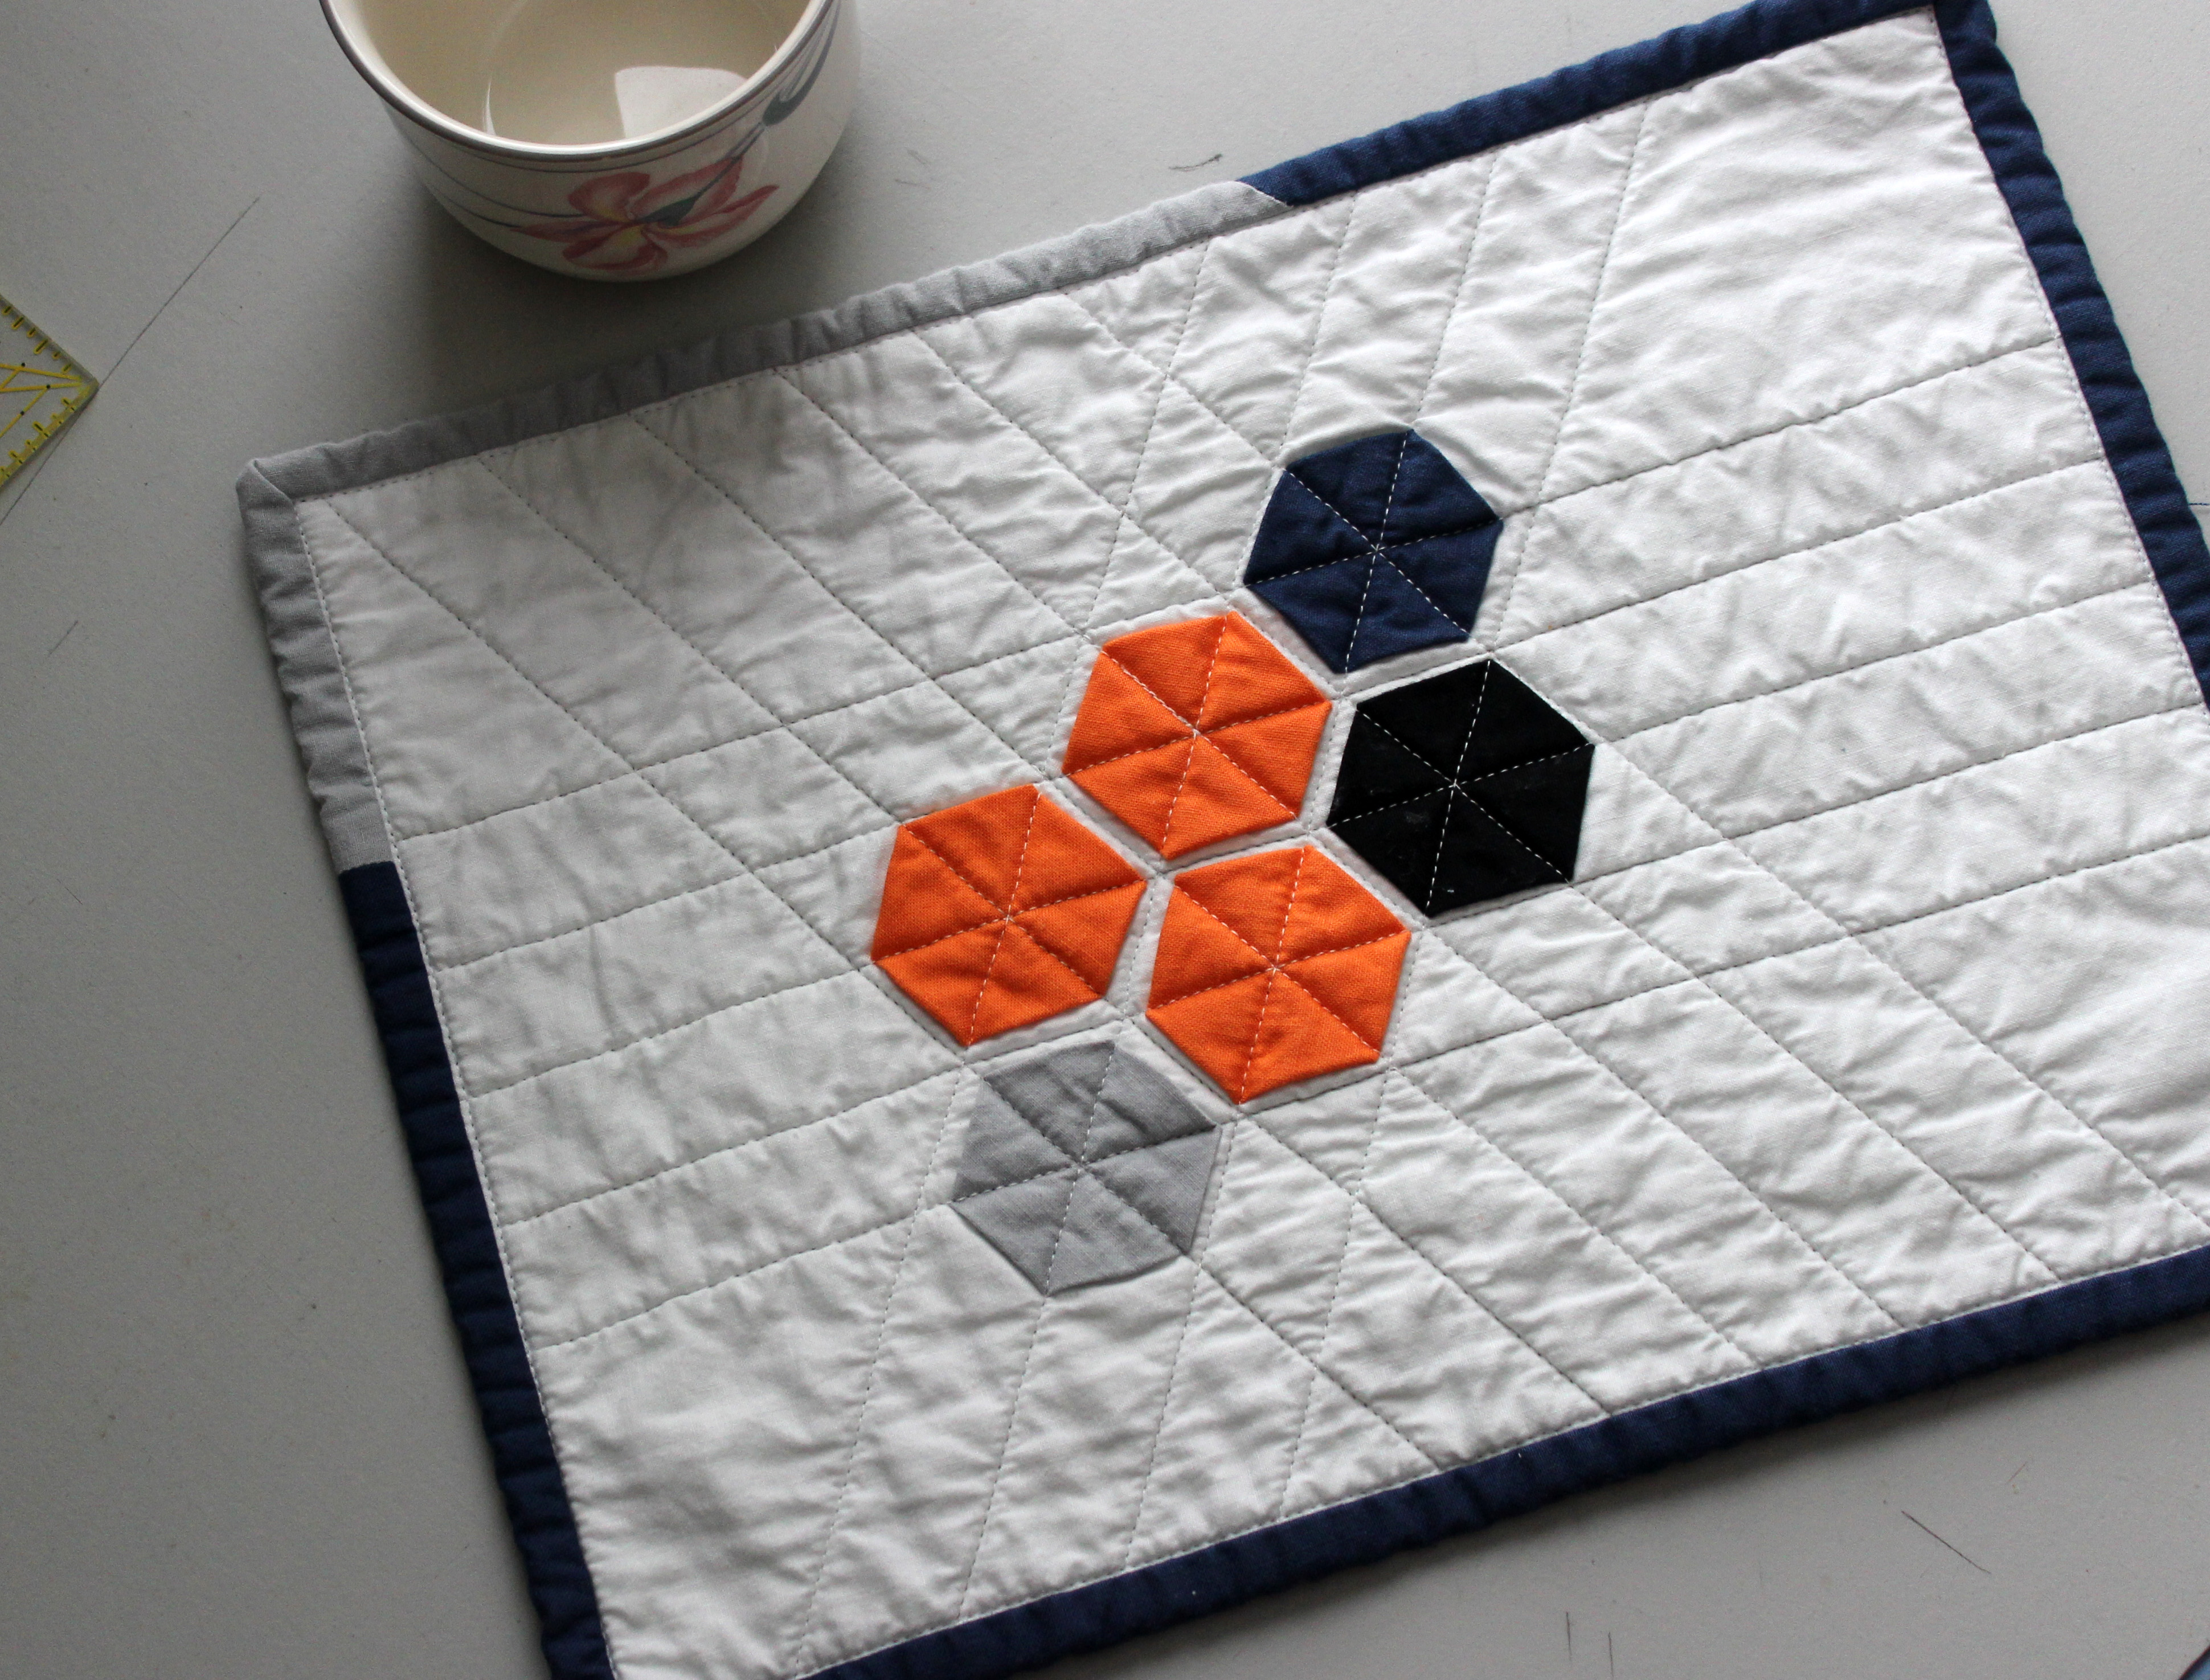
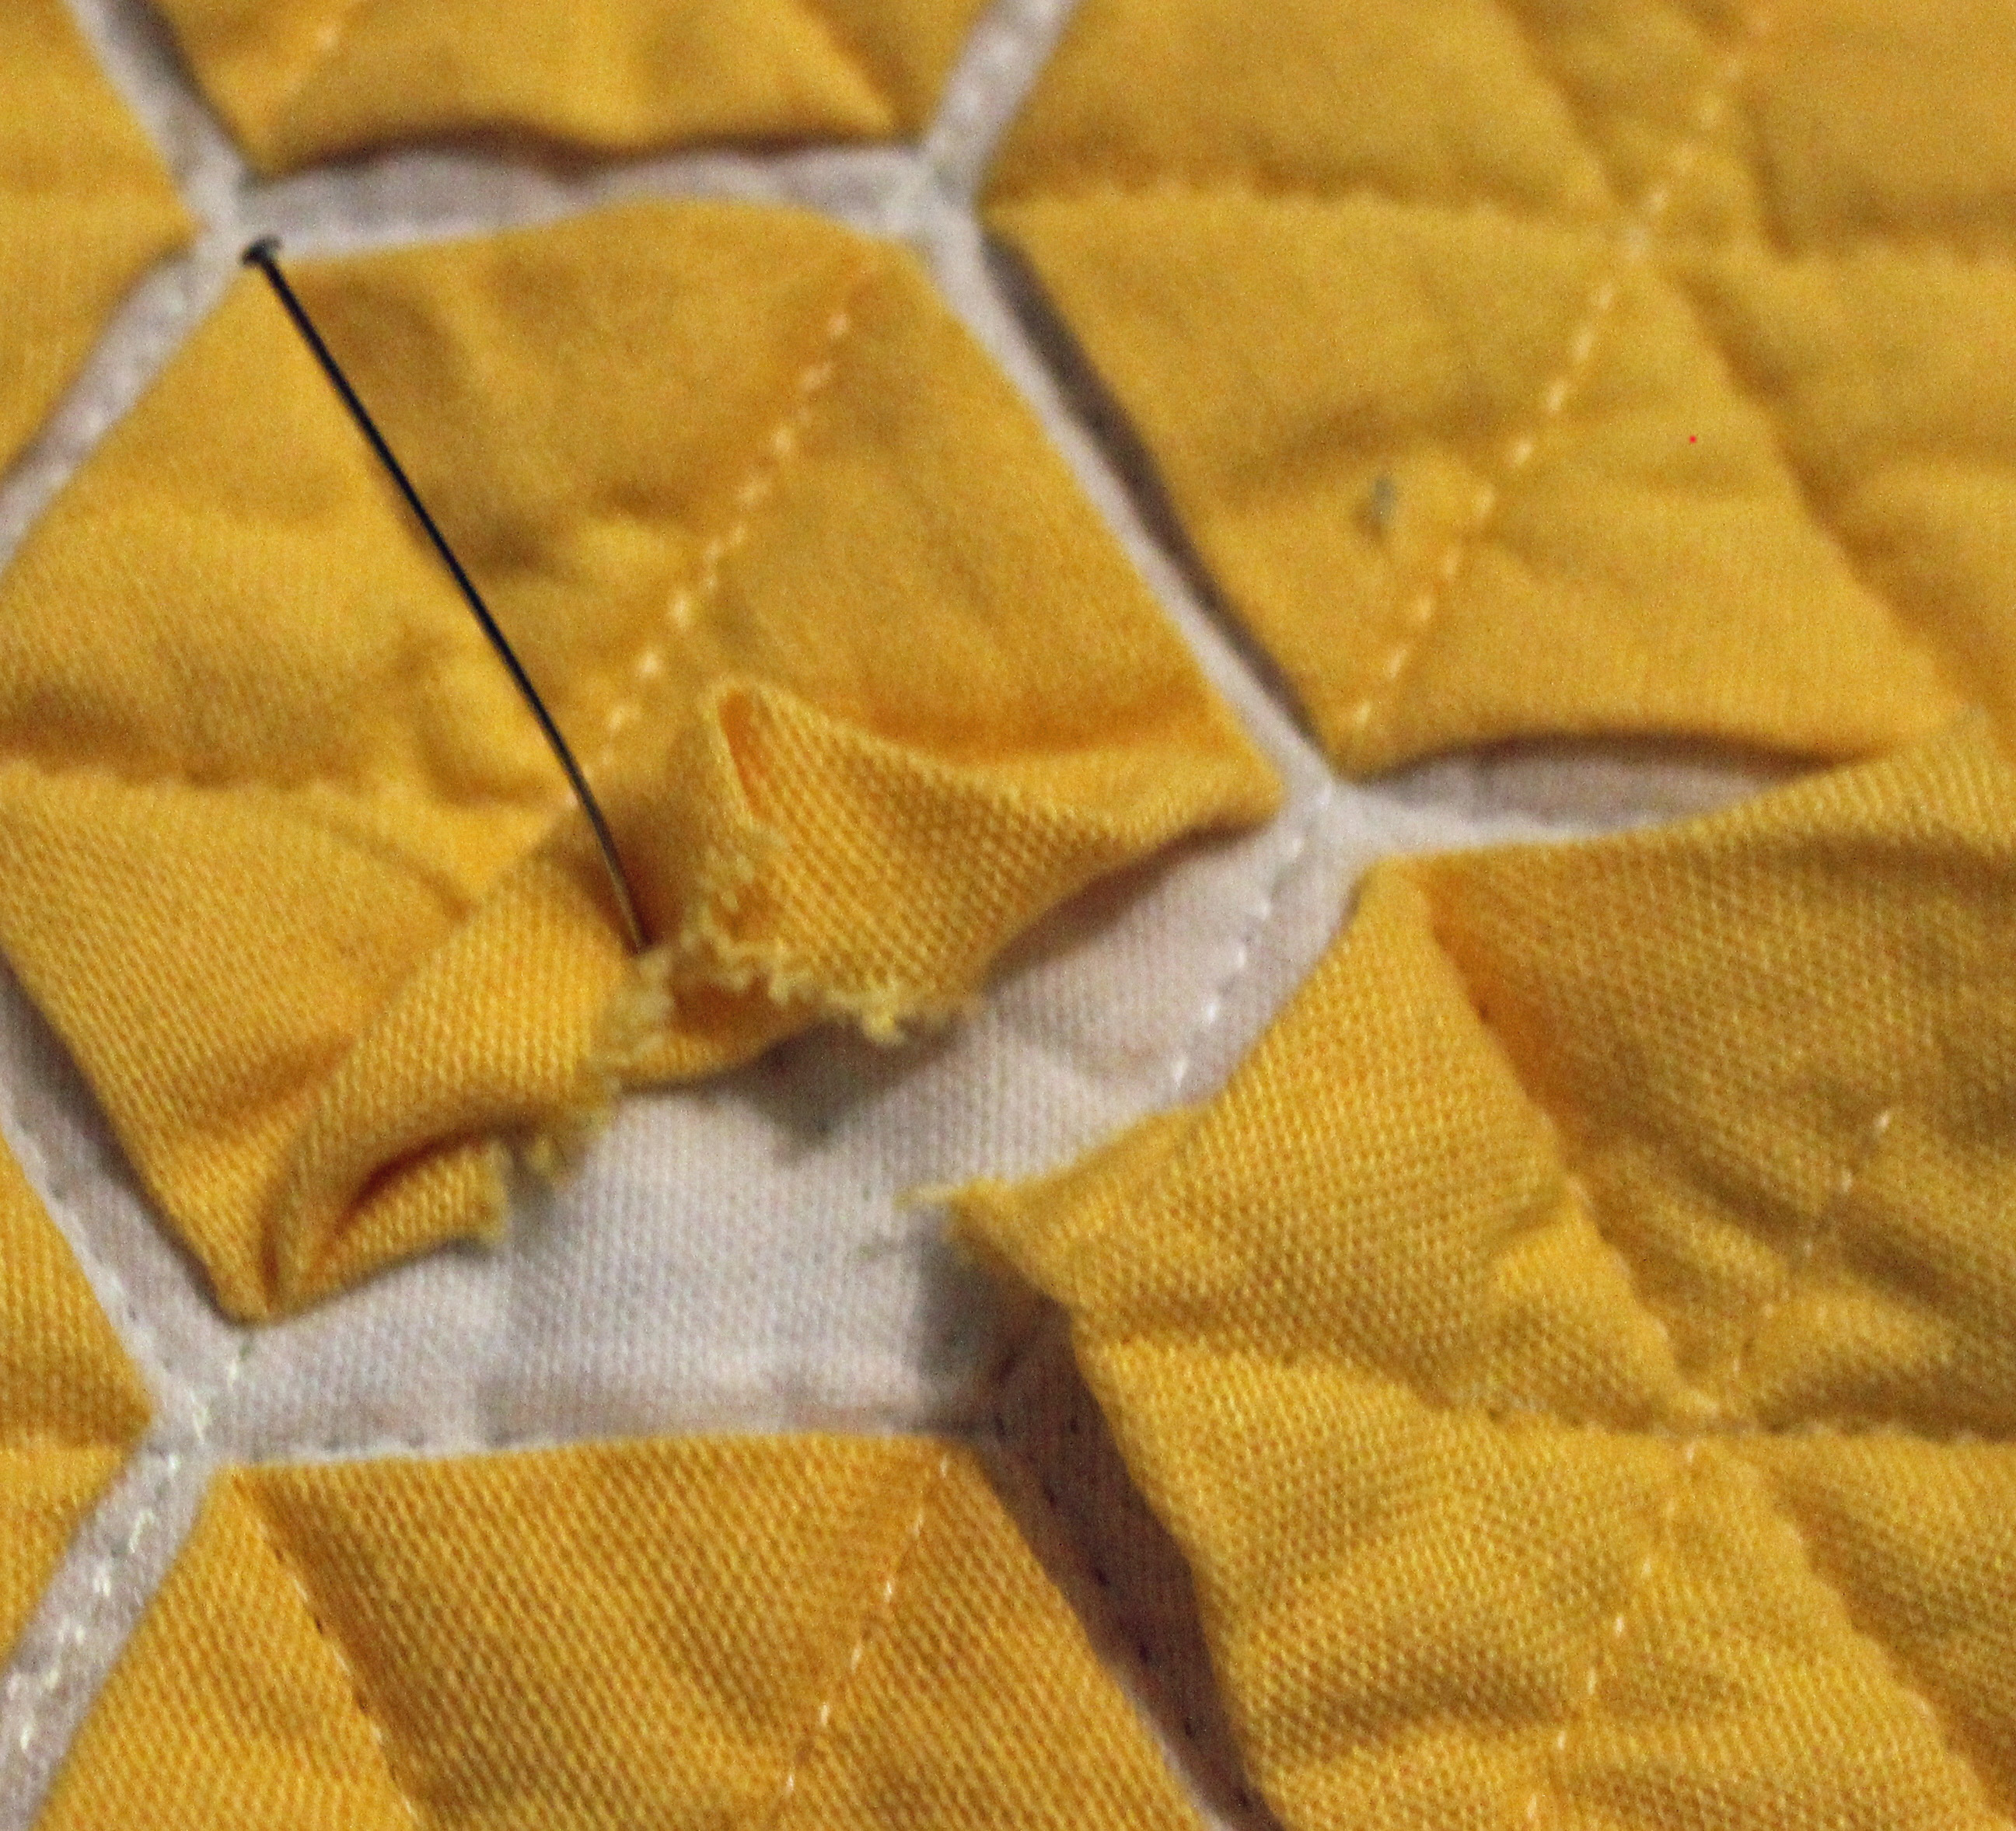
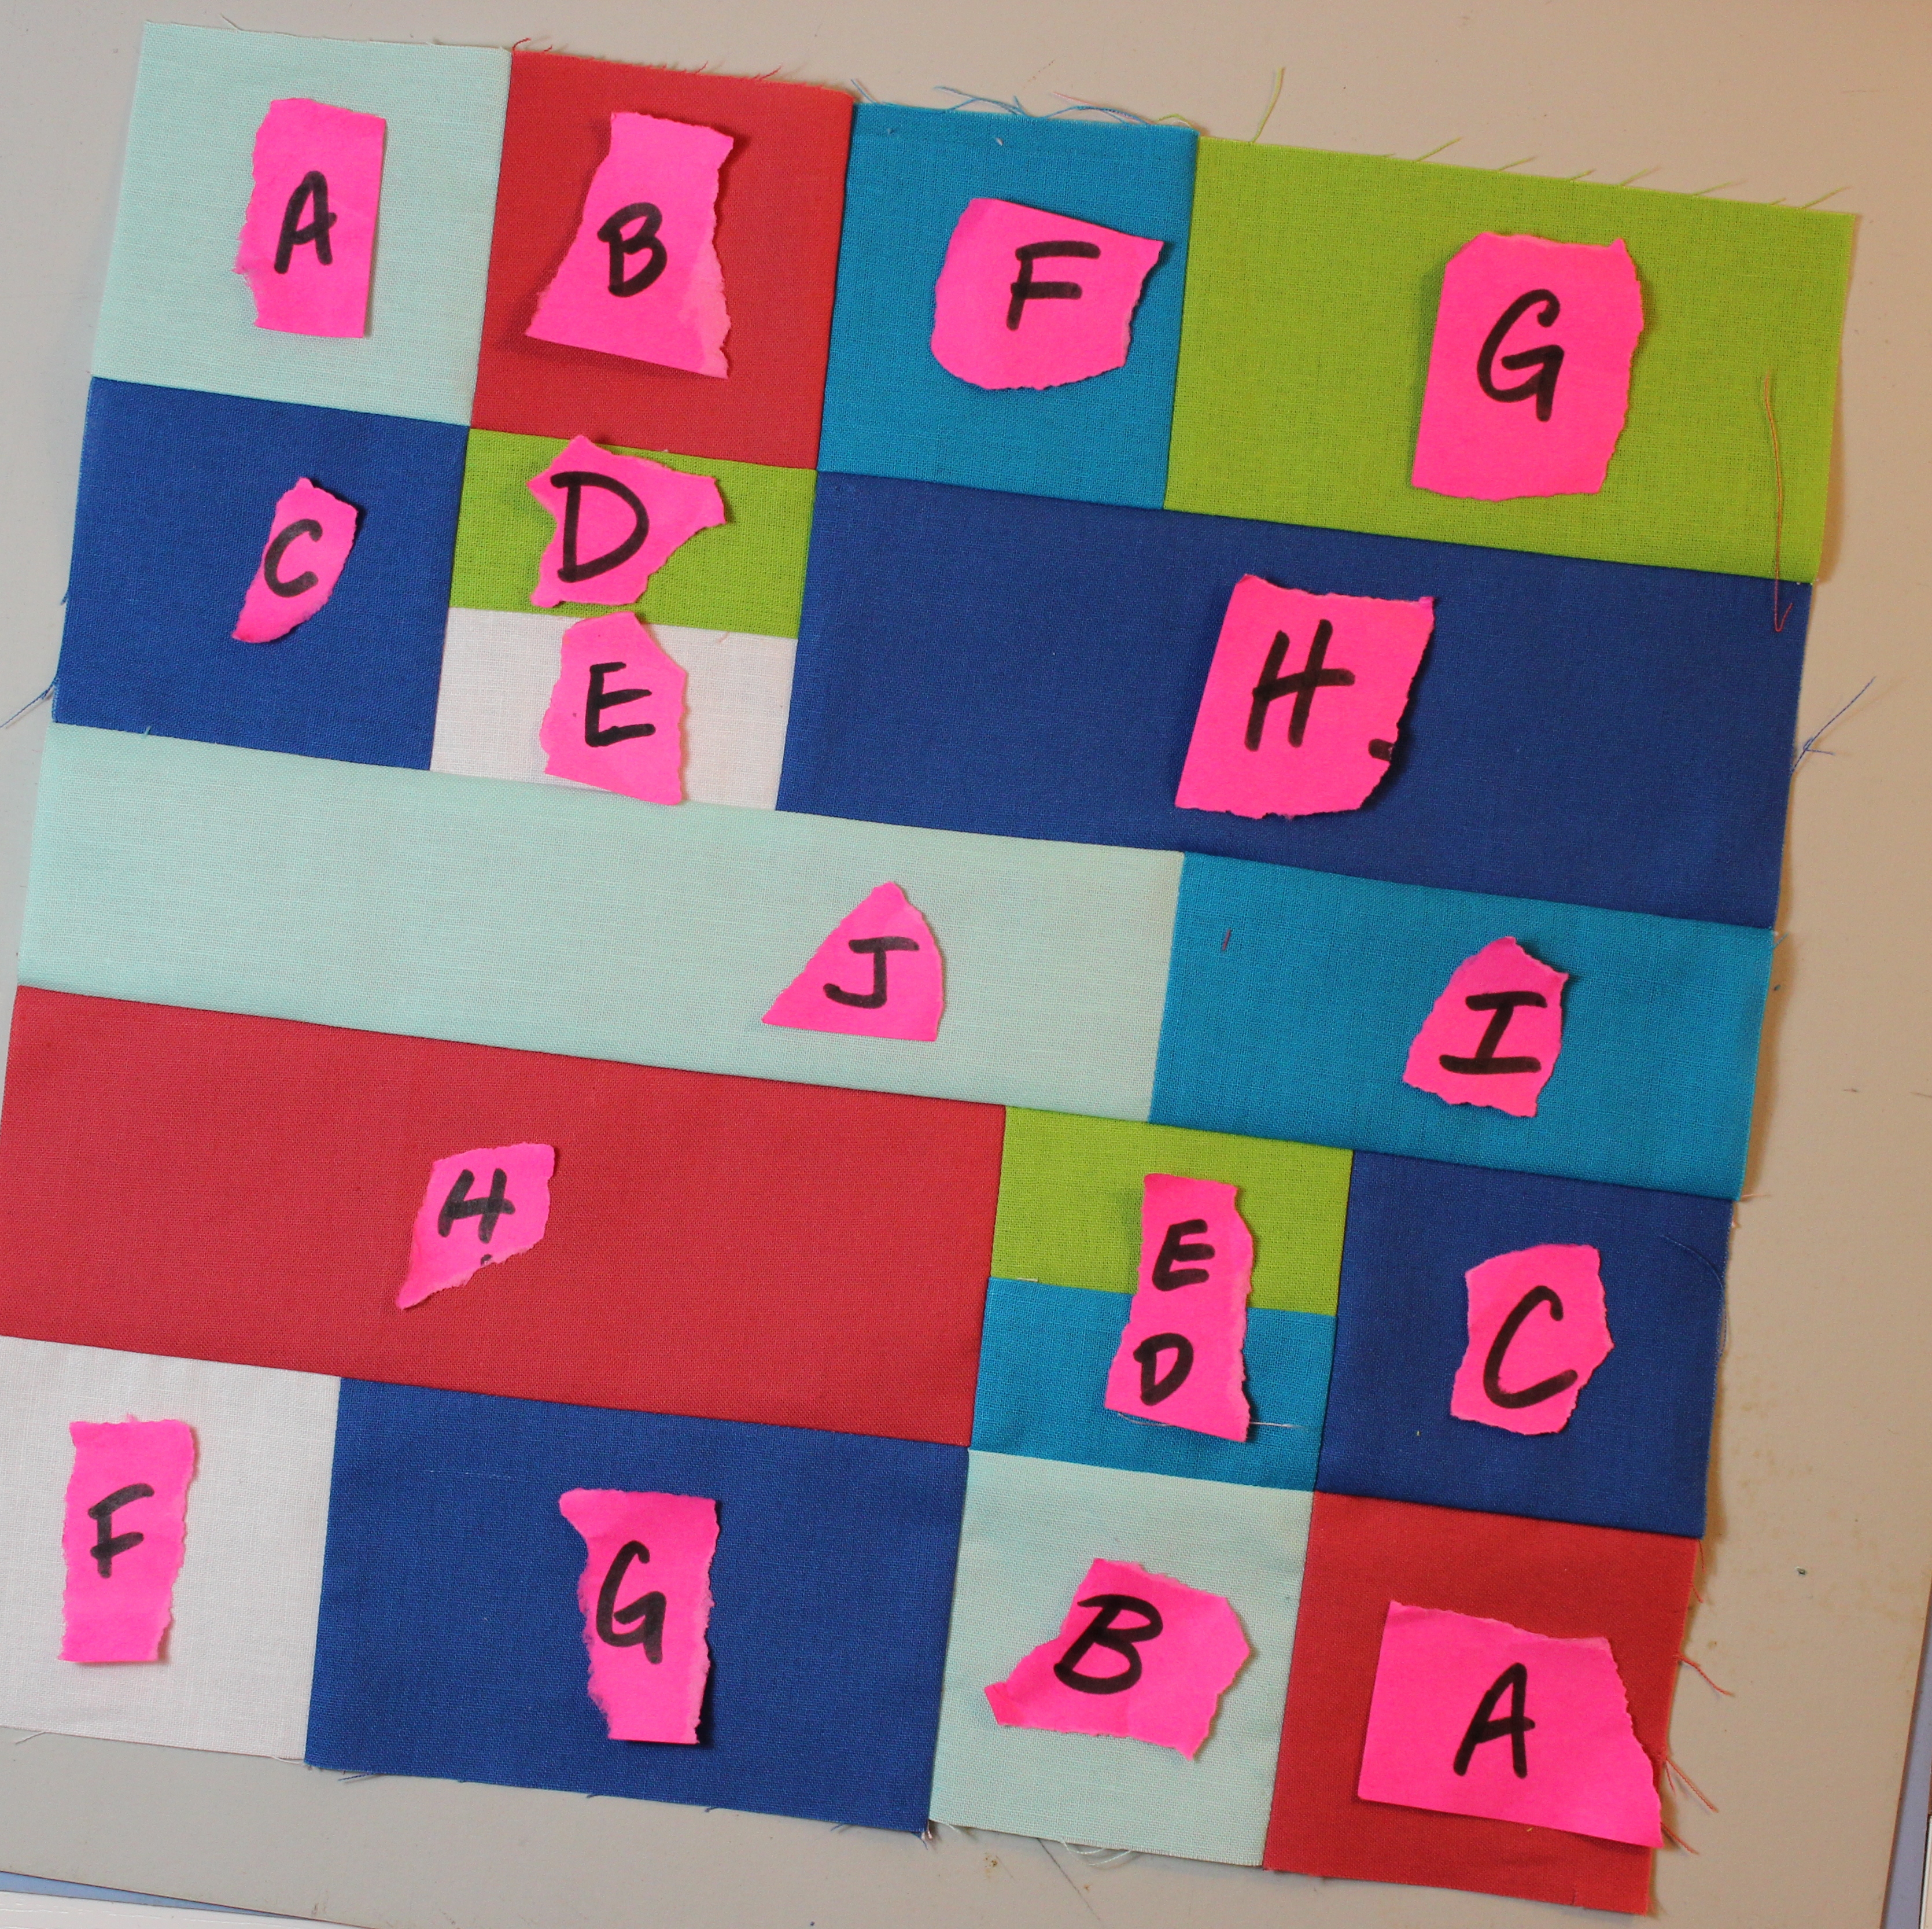
That’s it. I took some photos of the assembly of the blocks and marked them with letters. You can see how easy it is to CHANGE.

The Stephanie

The Stephanie

The Terri Ann

The Terri Ann

The Cheryl

The Cheryl

The Yvonne

The Yvonne

With the scraps I made “fabric slabs” and cut the pieces according to the Cutting Instructions to create The Wanda:

The Wanda

The Wanda

For a pdf version of the block, Subject to Change, click here.

The four-day Blog Hop features more than 60 blogs where you will find free 12 x 12 inch quilt blocks. Today we have these bloggers:

Host – Yvonne @Quilting Jetgirl
Kelly @Quilting it Out
Martha @Once a Wingnut
Irene @Patchwork and Pastry
Cassandra @The (not so) Dramatic Life
Andrea @The Sewing Fools
Bernie @Needle and Foot
Silvia @A Stranger View
Wanda @Wanda’s Life Sampler
Sandra @Musings of a Menopausal Melon
Vicki @Orchid Owl Quilts
Jess @Quilty Habit
Diana @Red Delicious Life
Chelsea @Patch the Giraffe
Margo @Shadow Lane Quilts
Renee @Quilts of a Feather

There is also a giveaway each day on each hosts’ blog. Yvonne is today’s host. Inspired by Fabric blog will also be hosting a giveaway.

And, we are donating our blocks to the hosts who are going to make charity quilts for Project Linus, Meyers Center and Teen Impact.

Subject to Change,

Wanda

Hexagon Applique Tutorial

In my Random Perfection quilt I used hexagon applique. To avoid the problems I encountered where the fabric came out,  you will need to make sure some of the folded fabric comes underneath each stitch line. Also, I didn’t use Aleene’s Fabric Fusion glue which is a permanent glue. That may explain why the folds came out as well.

First I’m going to show you how to make a perfect hexagon applique. Then I’ll show you the “more fabric” way which will result in all the edges staying inside the hexagon applique even without permanent glue.

There is more than one way to make a perfect hexagon for applique and English paper piecing, but I like this method.

A PERFECT HEXAGON APPLIQUE (7/8 inch)

Cut a strip 2 5/8

Cut a strip 2 5/8″

Cut across the strip 2 1/2

Cut across the strip 2 1/2″. The piece is now 2 1/2″ by 2 5/8″.

Add a dap of glue to your paper hexagon (this is 7/8

Add a dab of glue to your paper hexagon (this is a 7/8″ hexagon)

Trim around the edges. There should be at least 3/8

Trim around the edges. There should be at least 3/8″ from the edge of the paper to the edge of the fabric.

Spray regular starch into lid of starch and apply a small amount around the edges.

Spray regular starch into lid of starch and apply a small amount around the edges of the hexagon with a brush.

Press the hexagon with an iron.

Press the hexagon with an iron.

This is a perfect hexagon applique. You can remove the paper and there’s no basting strings to remove.

A BETTER APPROACH FOR THE MODERN HANDCRAFT TECHNIQUE

Use more fabric and don’t trim the fabric into a hexagon. Instead, do this:

Dab a little glue on paper and attach to the fabric. Do not trim into a hexagon shape. Press.

Dab a little glue on the paper and attach to the fabric. Do not trim into a hexagon shape. Press.

hexagons more fabric

LET’S EXPERIMENT

  • Make a few hexagons with the “more fabric” method and apply them using glue. I used Appli-Glue (it washes out).
  • Draw lines 7/8″ apart.
  • Space the hexies 1/4″ apart (1/8″ inch from the hexie edge to the drawn line)

hexagons experiment measuring

  • Make a quilt sandwich:

hexagon quilt sandwich

  • Stitch straight across the points. It takes three passes to get all the points.

hexagon stitch hexagons quilted

  • Square up and bind.
  • Wash it.

What happened?

hexagon experiment closeup

hexagon experiment

Success! None of the ends came out.

Taking a break from experimenting,

Wanda

I’m linking up with The Late Night Quilters’ Tips and Tutorials Tuesdays.

Random Perfection

Birds fly.

Over the Rainbow, why then, oh why can’t I?

If happy little bluebirds fly beyond the rainbow, why oh why can’t I?

                                         —Over the Rainbow, Lyric by E.Y. Harburg, Music by Harold Arlen


One of my goals for 2015 was to finish my yellow hexagon applique quilt. The yellow hexagons led me to thinking about The Wizard of Oz musical which I saw last summer and the song, Over the Rainbow. I took the words and used hexagons as musical notes.

I hand appliqued the “notes” and added green and orange hexagons to my rainbow. I machine stitched them using the method I saw on Modern Handcraft.

I added orange for the binding and it looked fabulous.

  • Then I washed it!

why ohwhy can't II noticed that sides of the appliques were not stitched down and were coming out. This was caused by the way I folded the hexies. See in this photo the way the fabric was folded straight down. The stitching across the point of the hexagon did not catch the fabric. Some of the fabric caught and some didn’t.

yellow hexies up closeI fixed some of them. But, man, what a chore.

I’m looking at it and wondering, “why can’t I just embrace this?”

I took off all the hexies which weren’t nailed down — 303 hexies to be exact.

303 hexies

And, I loved the outcome:

random perfection

I would not have placed these hexies in this configuration, but it feels better than the pre-washed quilt. That’s Random Perfection.

Finding home in the random,

Wanda