Make a Design Wall Without Duct Tape

Since my daughter was home for the fall, I moved my sewing space into our bedroom. That meant creating a new design wall. Rather than attaching it to the wall like I did in her room, I made a portable one.

quilt design wall

With the previous one I used duct tape to attach the insulation boards together and created one large design wall. I also used duct tape to attach the flannel to the back of the insulation boards.

I skipped the tape and used silk pins for this one.

And, I made three separate design walls which I hung with pants hangers. You don’t have to use yellow flannel, but this is what I had in my stash.

SUPPLIES:

  • One (1) insulation board, 1/2 inch thick, 4 feet by 8 feet
  • Flannel
  • Three Flat Wood Pants Hanger

HOW TO:

  • Measure the insulation board into thirds. Mine was 96″ so 32″ each.
  • Draw a line along each 32″ line.

measure the insulation board

  • Score the insulation board with a knife:
  • Cut with a knife or a old rotary cutter.

cut the insulation board

  • Cut the flannel.

I cut mine about 2 1/4″ larger than the insulation.

52″ by 36.5″ (it doesn’t have be this exact size)

cut the flannel

  • Wrap the flannel around the insulation board:

pin the insulation board

  • Use silk pins to hold in place. Here’s where you don’t have to use duct tape which I used in my large design wall.
  • Miter all the corners and pin at an angle so that the pin doesn’t go through the front.

miter the corners

  • Attach cup hooks to the hall.

I used chalk to mark the level line.

cup hooks

  • Attach Pants Hanger to the insulation board and hang it:

attach pants hanger

I only hung two of the insulation boards and put the other one in the closet.

This was the perfect solution for me,

Wanda

Minimal Quiltmaking: what I learned

I am intrigued by minimal quilts. It’s funny, though, that a minimal quilt takes large sections of the same fabric. That usually means buying the same fabric in large qualities you might not purchase otherwise.  So not so minimal.

Gwen Marston’s book, Minimal Quiltmaking, was one of the first modern quilt books I purchased. I’ve not been at this modern quilting for that long. I got the book through American Quilter’s Society, which I joined last year.

Marston explains that her quilt, Red Square in Purple, had its roots in the early 1800s and was based upon a New England quilt.

She writes:

Discovering quilts like the c.1800 one is exactly why I’m always harping on the value of knowing what came before. The grandness of the old quilts, and others like it, is one of the reasons I value the tradition of quilting so much.

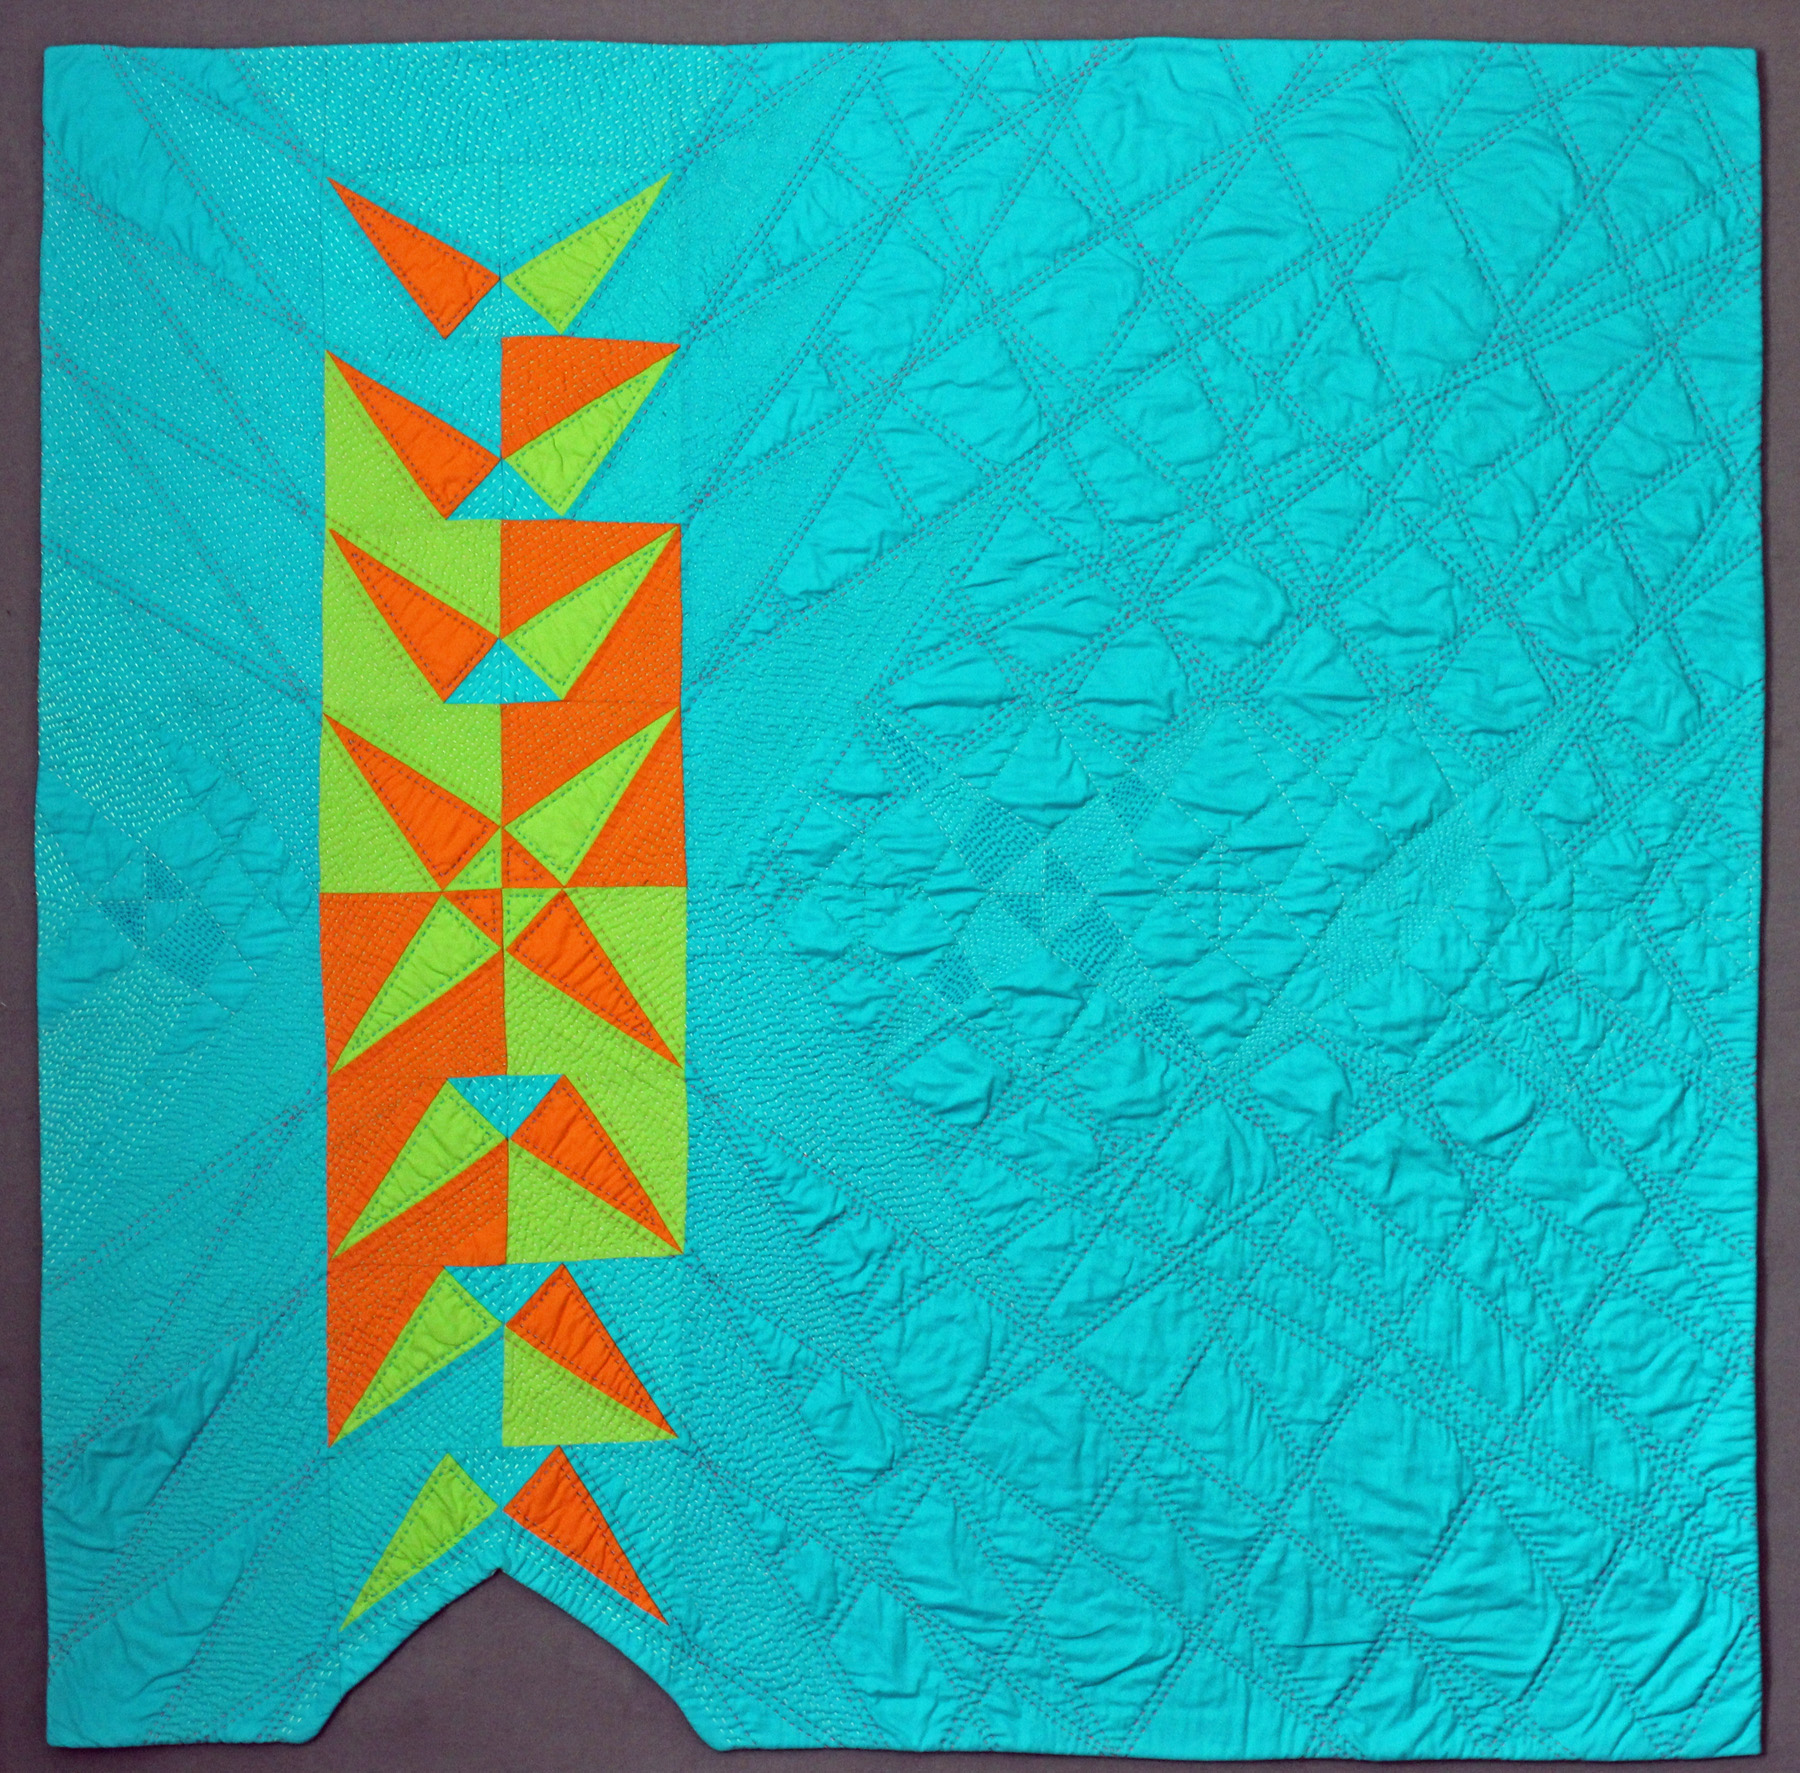
In keeping with that philosophy, she created “A Baker’s Dozen” of very minimal small quilts with extraordinary hand quilting. That was my inspiration for my quilt, Star-Crossed Canoes. I started with the idea of using a traditional block, Crossed Canoes, in a modern way, and to hand quilt all that negative space. This is the result:

Star-Crossed Canoes Full View

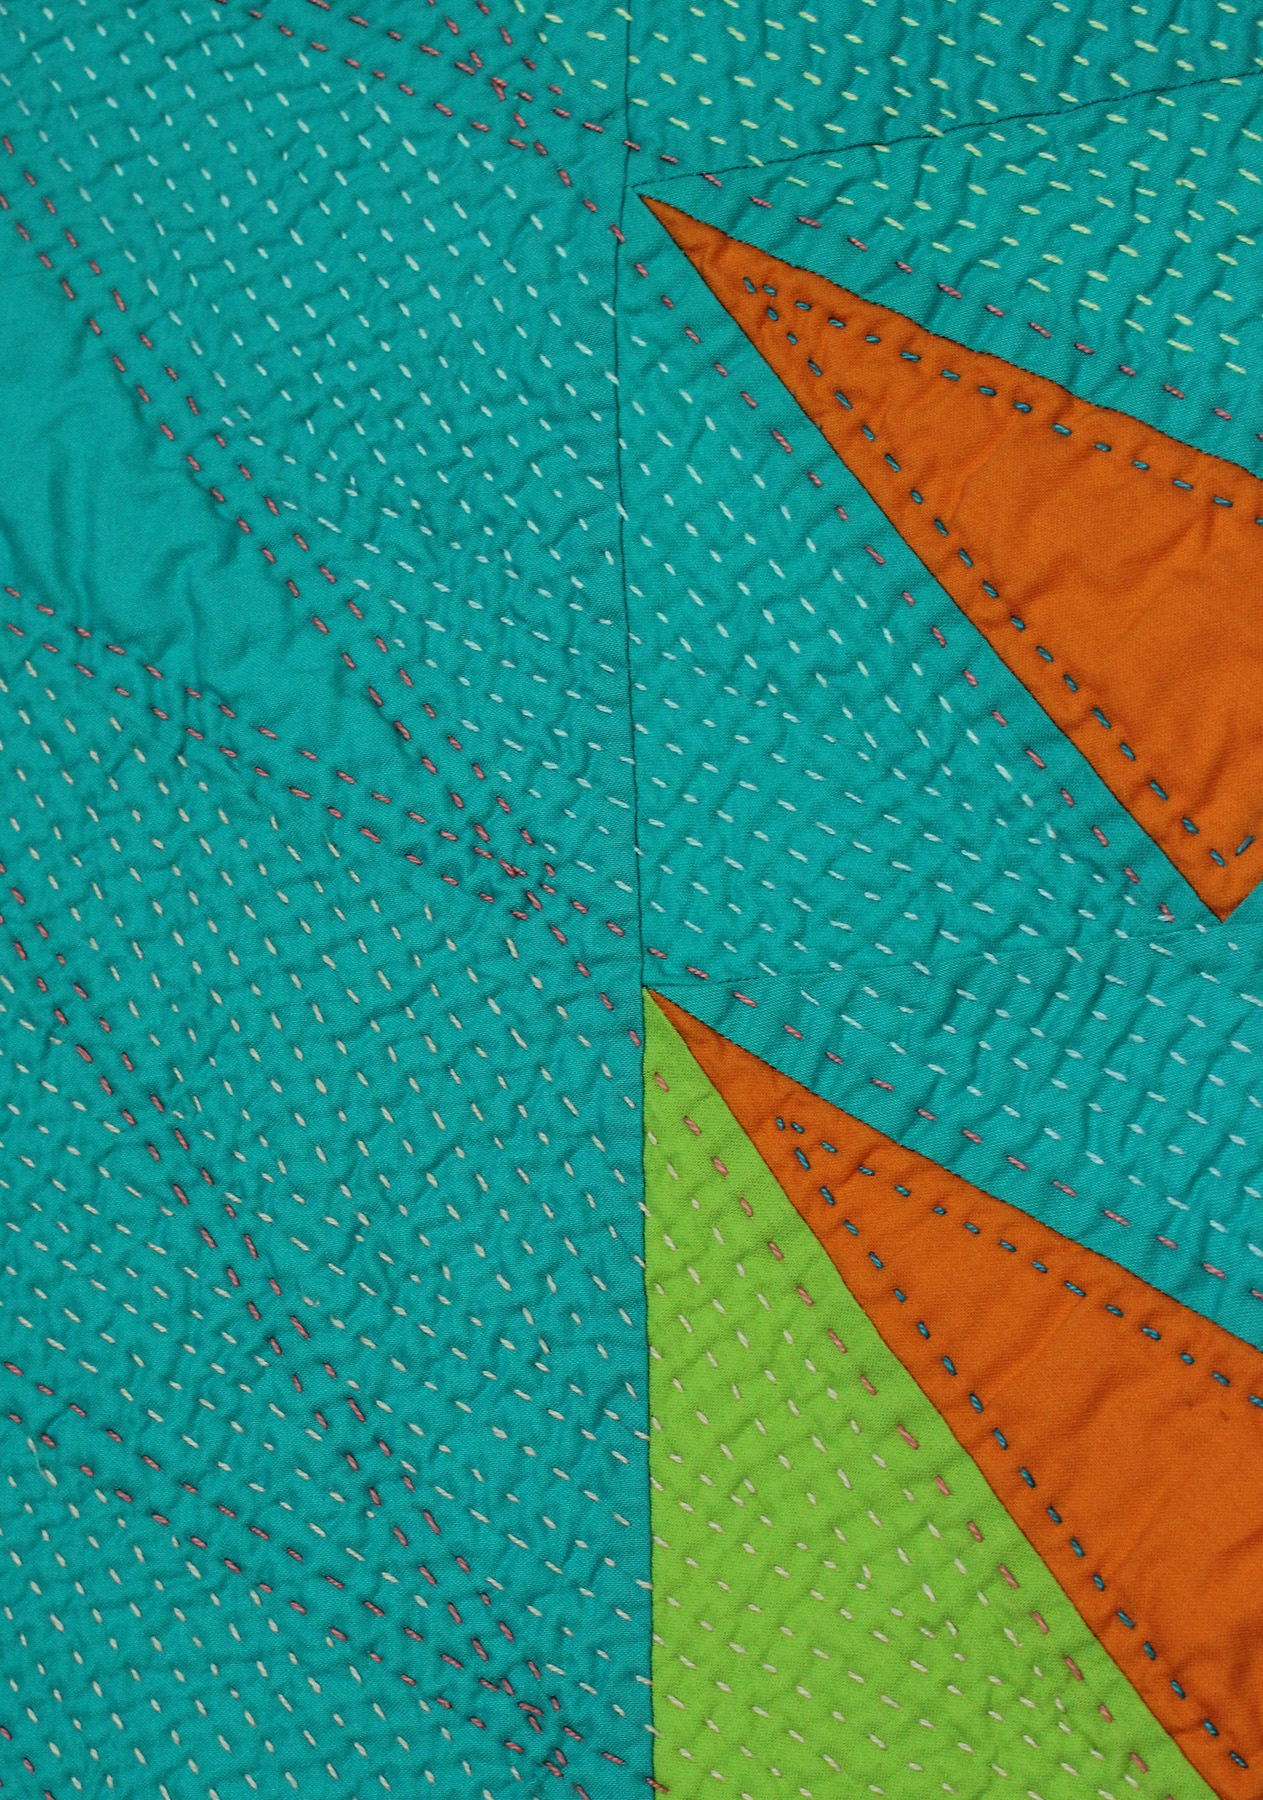
The traditional Crossed Canoe block is in the middle. The block itself has four parts so I made four blocks with the canoe surrounding by the background fabric, followed by blocks with one of the canoe colors added. It’s an exploration of this traditional block. I hope you can see I hand quilting some “ghost” canoes. I left some of the sections unquilted and love how they look like water. Star-Crossed Canoes Detail View

I did not use a traditional folded binding. Instead I used facing binding. I wrote about how to do this technique in a previous post. The cut-out at the bottom was difficult, I will admit, but worth it because it looks like another canoe or maybe a shark attack — haven’t decided.

I learned that making a minimal quilt is a thoughtful process and it takes more than just large amounts of the same fabric.

Minimal at heart,

Wanda

Play Crafts’ Palette Builder

I recently tried the Palette Builder (tutorial here) at Play Crafts. She’s a super nice person, and I like corresponding with her and reading her blog.

I used a photo from Lewis Ginter Botanical Gardens I took last July. I’m in love with this color palette:

Lewis Ginter orchids

From left to right, the Kona Cotton colors are: Black, Hunter Green, Smoke, Steel, Herb and Ballerina.

As the tutorial from Play Crafts explains, the Palette Builder does not pick out particular colors from the photo.

The palette builder actually chooses colors based on how often they appear in the image. That [hot pink] is just a small portion, small enough that it might not register because it appears too infrequently. Fortunately, now that you can easily drag the palette circles around, you can add that [hot pink] to the palette easily yourself. 

I wanted to see what would happen if I choose the “hot pink” from the photo:

Orchids with valentine

The pink is now “Valentine.” That captures the feeling for me better, but I’d throw in some Ballerina, too.

IMG_6268

I tried some other photos. I’m amazed at the colors I could find in this photo of shoulder pads:

shoulder pads

The Kona Cotton colors are:  Charcoal, Stone, Mushroom, Sunflower, Honey and Nectarine.

Looking for a calm color palette, let’s go to Sea Island, Georgia:

Sea Island-palette

The colors are: Emerald, Charcoal, Blue Bell, Delft, Evergreen and Graphite.

Color can have such an impact on how we feel. And, I like how all of these colors make me feel.

Feel the color,

Wanda